> ## Documentation Index
> Fetch the complete documentation index at: https://wiki.another-horizon.eu/llms.txt
> Use this file to discover all available pages before exploring further.

# Tutorial: Build an in-app documentation assistant

> Embed the assistant in your application to answer questions with information from your documentation.

## What you will build

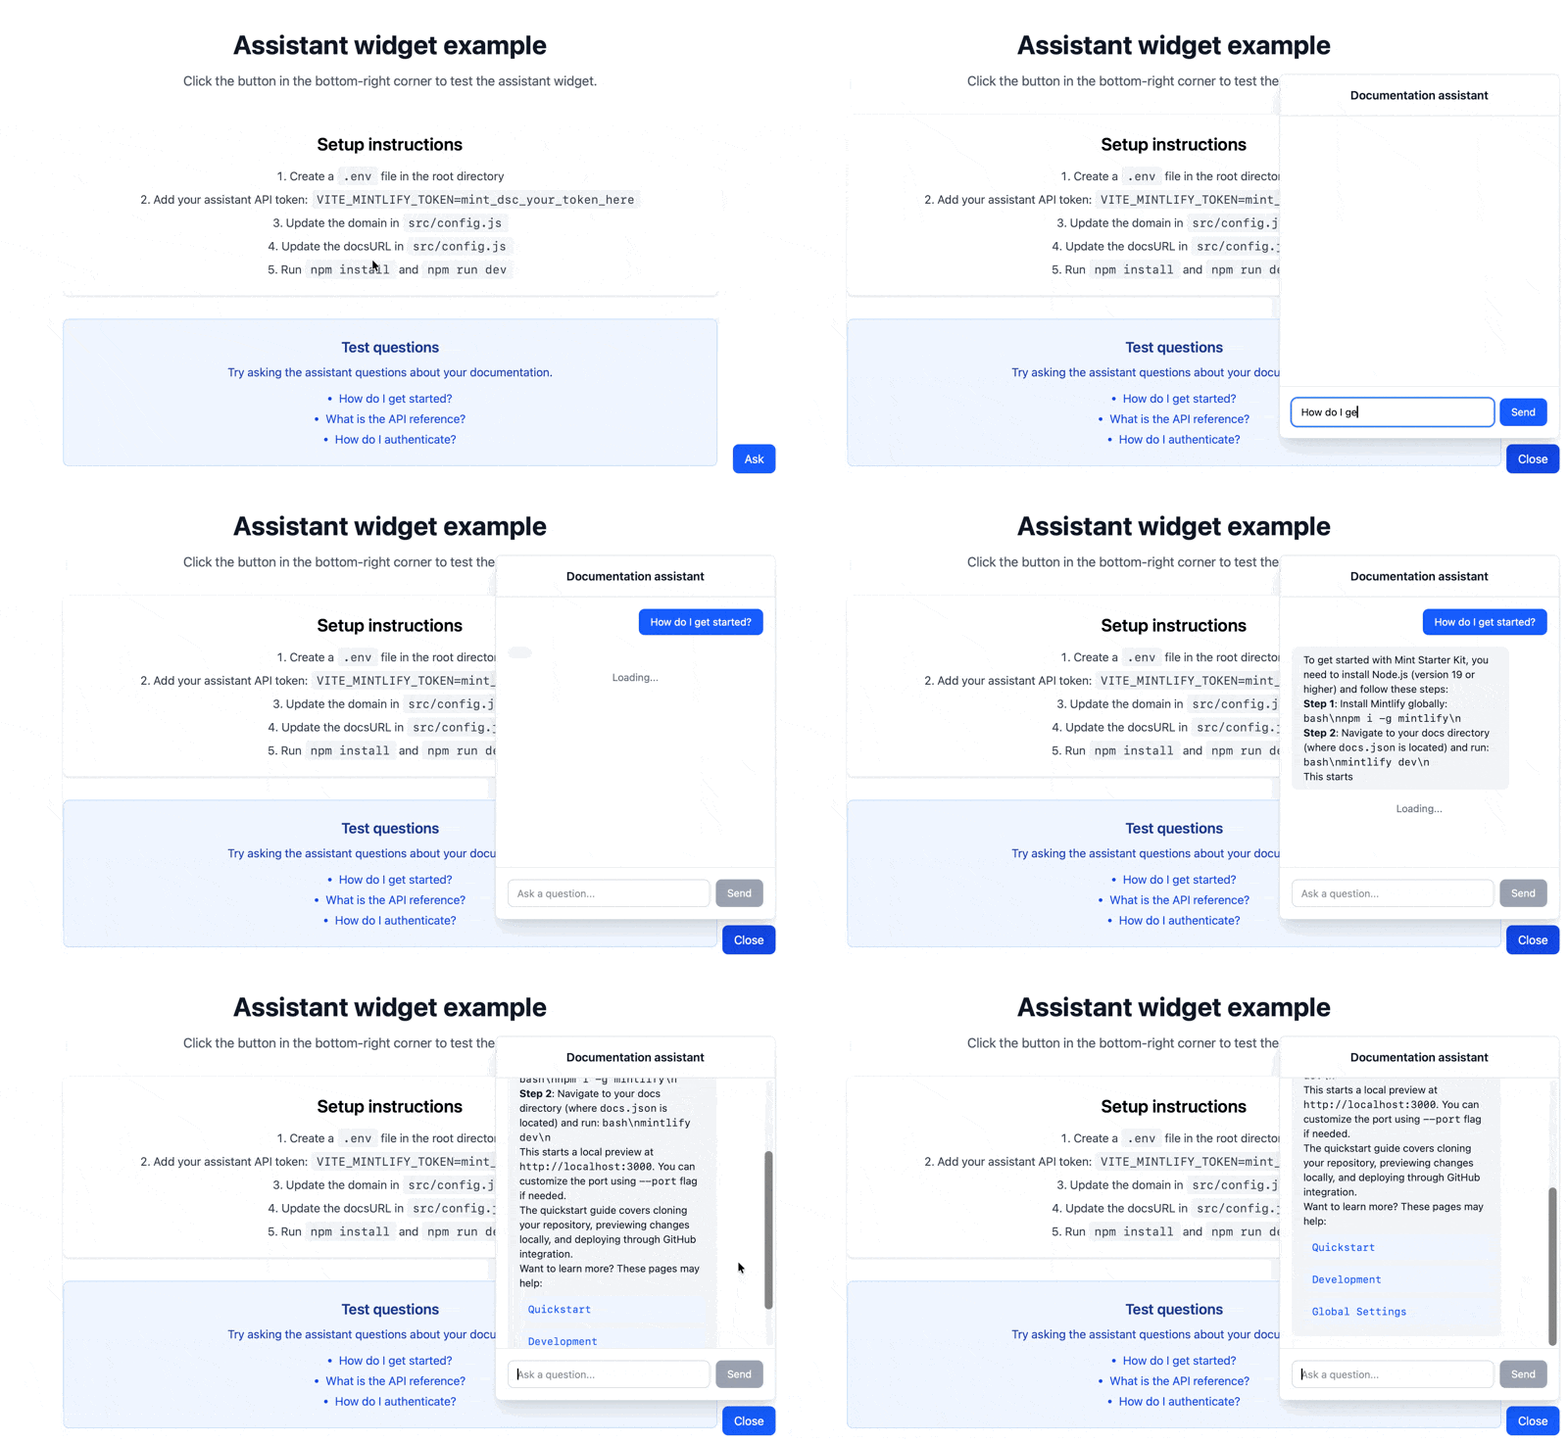
A reusable widget that embeds the [assistant](/ai/assistant) directly in your application. The widget provides:

* A floating button that opens a chat panel when clicked
* Real-time streaming responses based on information from your documentation
* Message rendering with Markdown support

Users can use the widget to get help with your product without leaving your application.

<Frame>
  <img src="https://mintcdn.com/anotherhorizon/J4BH3chw5X4BWXwI/images/assistant/assistant-embed-demo.gif?s=a51ab620428a3e573539dd35d8c507ef" alt="Demo of the assistant widget being opened and the user typing in How do I get started? Then the assistant responds." width="800" height="491" data-path="images/assistant/assistant-embed-demo.gif" />
</Frame>

## Prerequisites

* [Mintlify Pro or Custom plan](https://mintlify.com/pricing)
* Your domain name, which appears at the end of your dashboard URL. For example, if your dashboard URL is `https://dashboard.mintlify.com/org-name/domain-name`, your domain name is `domain-name`
* An [assistant API key](https://dashboard.mintlify.com/settings/organization/api-keys)
* Node.js v18 or higher and npm installed
* Basic React knowledge

### Get your assistant API key

1. Navigate to the [API keys](https://dashboard.mintlify.com/settings/organization/api-keys) page in your dashboard.
2. Click **Create Assistant API Key**.
3. Copy the assistant API key (starts with `mint_dsc_`) and save it securely.

<Note>
  The assistant API key is a public token that can be used in frontend code. Calls using this token count toward your plan's message allowance and can incur overages.
</Note>

## Set up the example

The quickest way to get started is to clone the [example repository](https://github.com/mintlify/assistant-embed-example) and customize it for your needs.

<Steps>
  <Step title="Clone the repository">
    ```bash theme={null}
    git clone https://github.com/mintlify/assistant-embed-example.git
    cd assistant-embed-example
    npm install
    ```
  </Step>

  <Step title="Configure your project">
    Open `src/config.js` and update with your Mintlify project details:

    ```js src/config.js theme={null}
    export const ASSISTANT_CONFIG = {
      domain: 'your-domain',
      docsURL: 'https://yourdocs.mintlify.app',
    };
    ```

    Replace:

    * `your-domain` with your Mintlify project domain found at the end of your dashboard URL.
    * `https://yourdocs.mintlify.app` with your actual documentation URL.
  </Step>

  <Step title="Add your API token">
    Create a `.env` file in the project root:

    ```bash .env theme={null}
    VITE_MINTLIFY_TOKEN=mint_dsc_your_token_here
    ```

    Replace `mint_dsc_your_token_here` with your assistant API key.
  </Step>

  <Step title="Start the development server">
    ```bash theme={null}
    npm run dev
    ```

    Open your application in a browser and click the **Ask** button to open the assistant widget.
  </Step>
</Steps>

## Project structure

The example uses a component-based architecture.

```text theme={null}
src/
├── App.css                 # App styles
├── App.jsx                 # Main app component that renders the widget
├── config.js               # Configuration (domain and docsURL)
├── index.css               # Global styles
├── main.jsx                # Entry point
├── utils.js                # Helper functions for parsing suggestions and extracting sources
└── components/
    ├── AssistantWidget.jsx # Main widget component with chat state and API logic
    └── Message.jsx         # Individual message component for rendering user and assistant messages
```

**Key files:**

* **`src/App.jsx`**: Main app component. Shows how to import and use the `AssistantWidget` component.
* **`src/config.js`**: Centralized configuration. Update this file with your domain and docs URL.
* **`src/components/AssistantWidget.jsx`**: The main widget component. Manages the open/close state, chat messages, and API calls.
* **`src/utils.js`**: Contains utility functions for parsing the assistant's response format and extracting sources.
* **`src/components/Message.jsx`**: Renders individual messages with support for Markdown and suggestion links.

## Customization ideas

### Source citations

Extract and display sources from assistant responses:

```jsx theme={null}
const extractSources = (parts) => {
  return parts
    ?.filter(p => p.type === 'tool-invocation' && p.toolInvocation?.toolName === 'search')
    .flatMap(p => p.toolInvocation?.result || [])
    .map(source => ({
      url: source.url || source.path,
      title: source.metadata?.title || source.path,
    })) || [];
};

// In your message rendering:
{messages.map((message) => {
  const sources = message.role === 'assistant' ? extractSources(message.parts) : [];
  return (
    <div key={message.id}>
      {/* message content */}
      {sources.length > 0 && (
        <div className="mt-2 text-xs">
          <p className="font-semibold">Sources:</p>
          {sources.map((s, i) => (
            <a key={i} href={s.url} target="_blank" rel="noopener noreferrer" className="text-blue-600">
              {s.title}
            </a>
          ))}
        </div>
      )}
    </div>
  );
})}
```

### Track conversation thread IDs

Store thread IDs to maintain conversation history across sessions:

```jsx theme={null}
import { useState, useEffect } from 'react';

export function AssistantWidget({ domain, docsURL }) {
  const [threadId, setThreadId] = useState(null);

  useEffect(() => {
    // Retrieve saved thread ID from localStorage
    const saved = localStorage.getItem('assistant-thread-id');
    if (saved) {
      setThreadId(saved);
    }
  }, []);

  const { messages, input, handleInputChange, handleSubmit, isLoading } = useChat({
    api: `https://api.mintlify.com/discovery/v1/assistant/${domain}/message`,
    headers: {
      'Authorization': `Bearer ${import.meta.env.VITE_MINTLIFY_TOKEN}`,
    },
    body: {
      fp: 'anonymous',
      retrievalPageSize: 5,
      ...(threadId && { threadId }), // Include thread ID if available
    },
    streamProtocol: 'data',
    sendExtraMessageFields: true,
    fetch: async (url, options) => {
      const response = await fetch(url, options);
      const newThreadId = response.headers.get('x-thread-id');
      if (newThreadId) {
        setThreadId(newThreadId);
        localStorage.setItem('assistant-thread-id', newThreadId);
      }
      return response;
    },
  });

  // ... rest of component
}
```

### Add keyboard shortcuts

Allow users to open the widget and submit messages with keyboard shortcuts:

```jsx theme={null}
useEffect(() => {
  const handleKeyDown = (e) => {
    // Cmd/Ctrl + Shift + I to toggle widget
    if ((e.metaKey || e.ctrlKey) && e.shiftKey && e.key === 'I') {
      e.preventDefault();
      setIsOpen((prev) => !prev);
    }

    // Enter (when widget is focused) to submit
    if (e.key === 'Enter' && !e.shiftKey && document.activeElement.id === 'assistant-input') {
      e.preventDefault();
      handleSubmit();
    }
  };

  window.addEventListener('keydown', handleKeyDown);
  return () => window.removeEventListener('keydown', handleKeyDown);
}, [handleSubmit]);
```
