> ## Documentation Index
> Fetch the complete documentation index at: https://wiki.another-horizon.eu/llms.txt
> Use this file to discover all available pages before exploring further.
# GitLab
> Connect to a GitLab repository for automated deployments and preview builds.
We use access tokens and webhooks to authenticate and sync changes between GitLab and Mintlify.
* Mintlify uses access tokens to pull information from GitLab.
* GitLab uses webhooks to notify Mintlify when changes are made, enabling preview deployments for merge requests.
## Set up the connection
**HTTPS cloning required**: Your GitLab project must have HTTPS cloning enabled for Mintlify to access your repository. You can verify this in GitLab by going to your project's **Settings** > **General** > **Visibility and access controls** section.
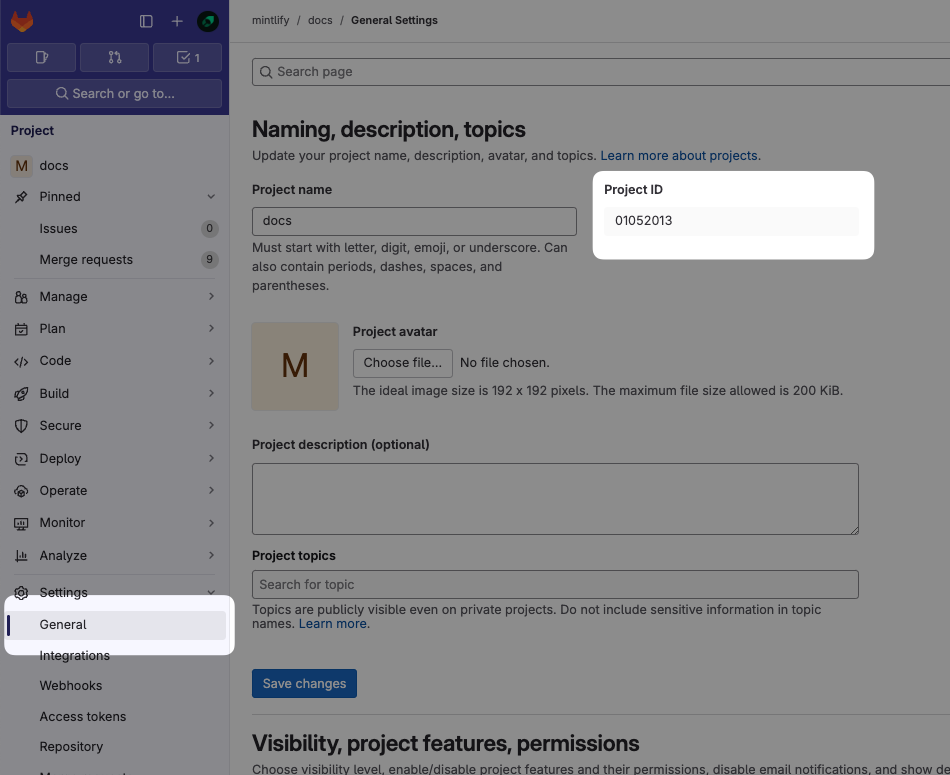
In your GitLab project, navigate to **Settings** > **General** and locate your **Project ID**.
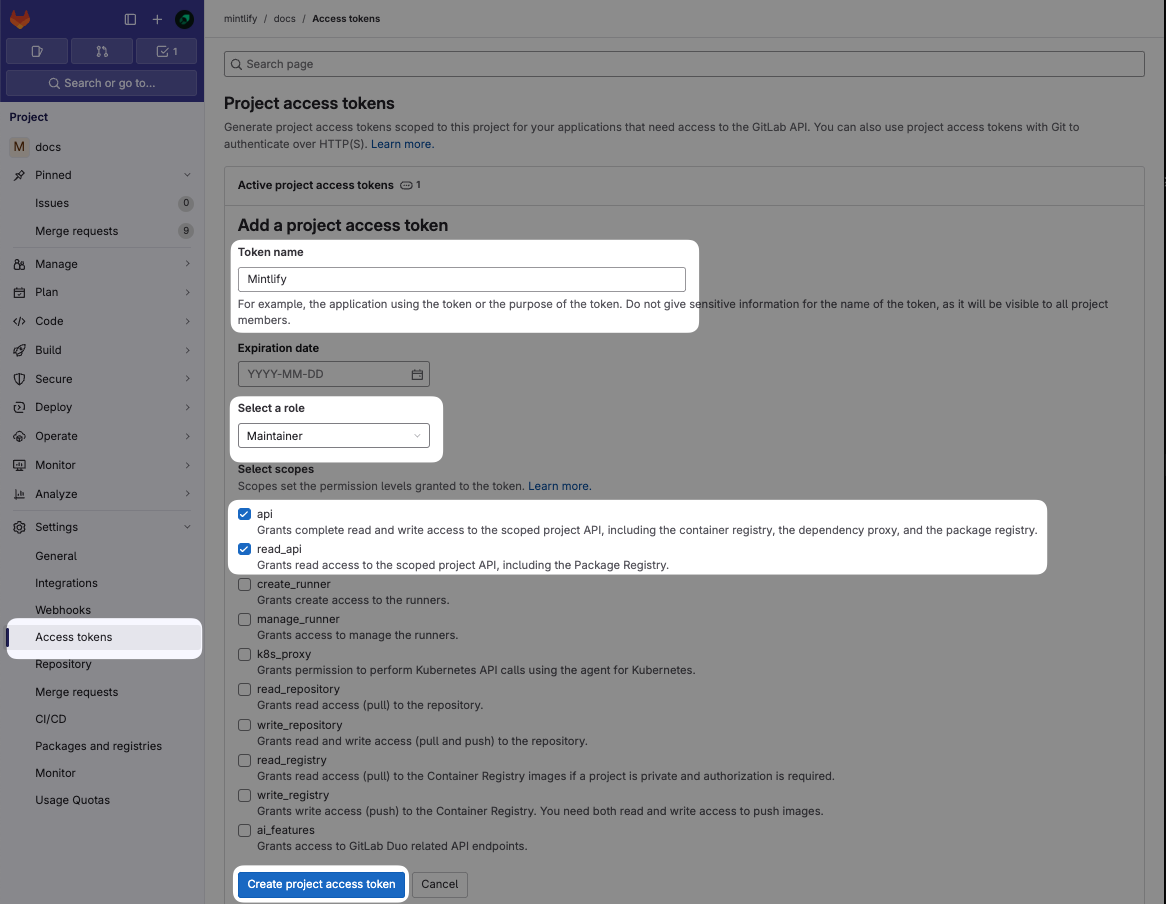
 Navigate to **Settings** > **Access Tokens** and select **Add new token**.
Configure the token with these settings:
* **Name**: Mintlify
* **Role**: Maintainer (required for private repos)
* **Scopes**: `api` and `read_api`
Click **Create project access token** and copy the token.
If Project Access Tokens are not available, you can use a Personal Access Token instead. Note that Personal Access Tokens expire and must be updated.
Navigate to **Settings** > **Access Tokens** and select **Add new token**.
Configure the token with these settings:
* **Name**: Mintlify
* **Role**: Maintainer (required for private repos)
* **Scopes**: `api` and `read_api`
Click **Create project access token** and copy the token.
If Project Access Tokens are not available, you can use a Personal Access Token instead. Note that Personal Access Tokens expire and must be updated.
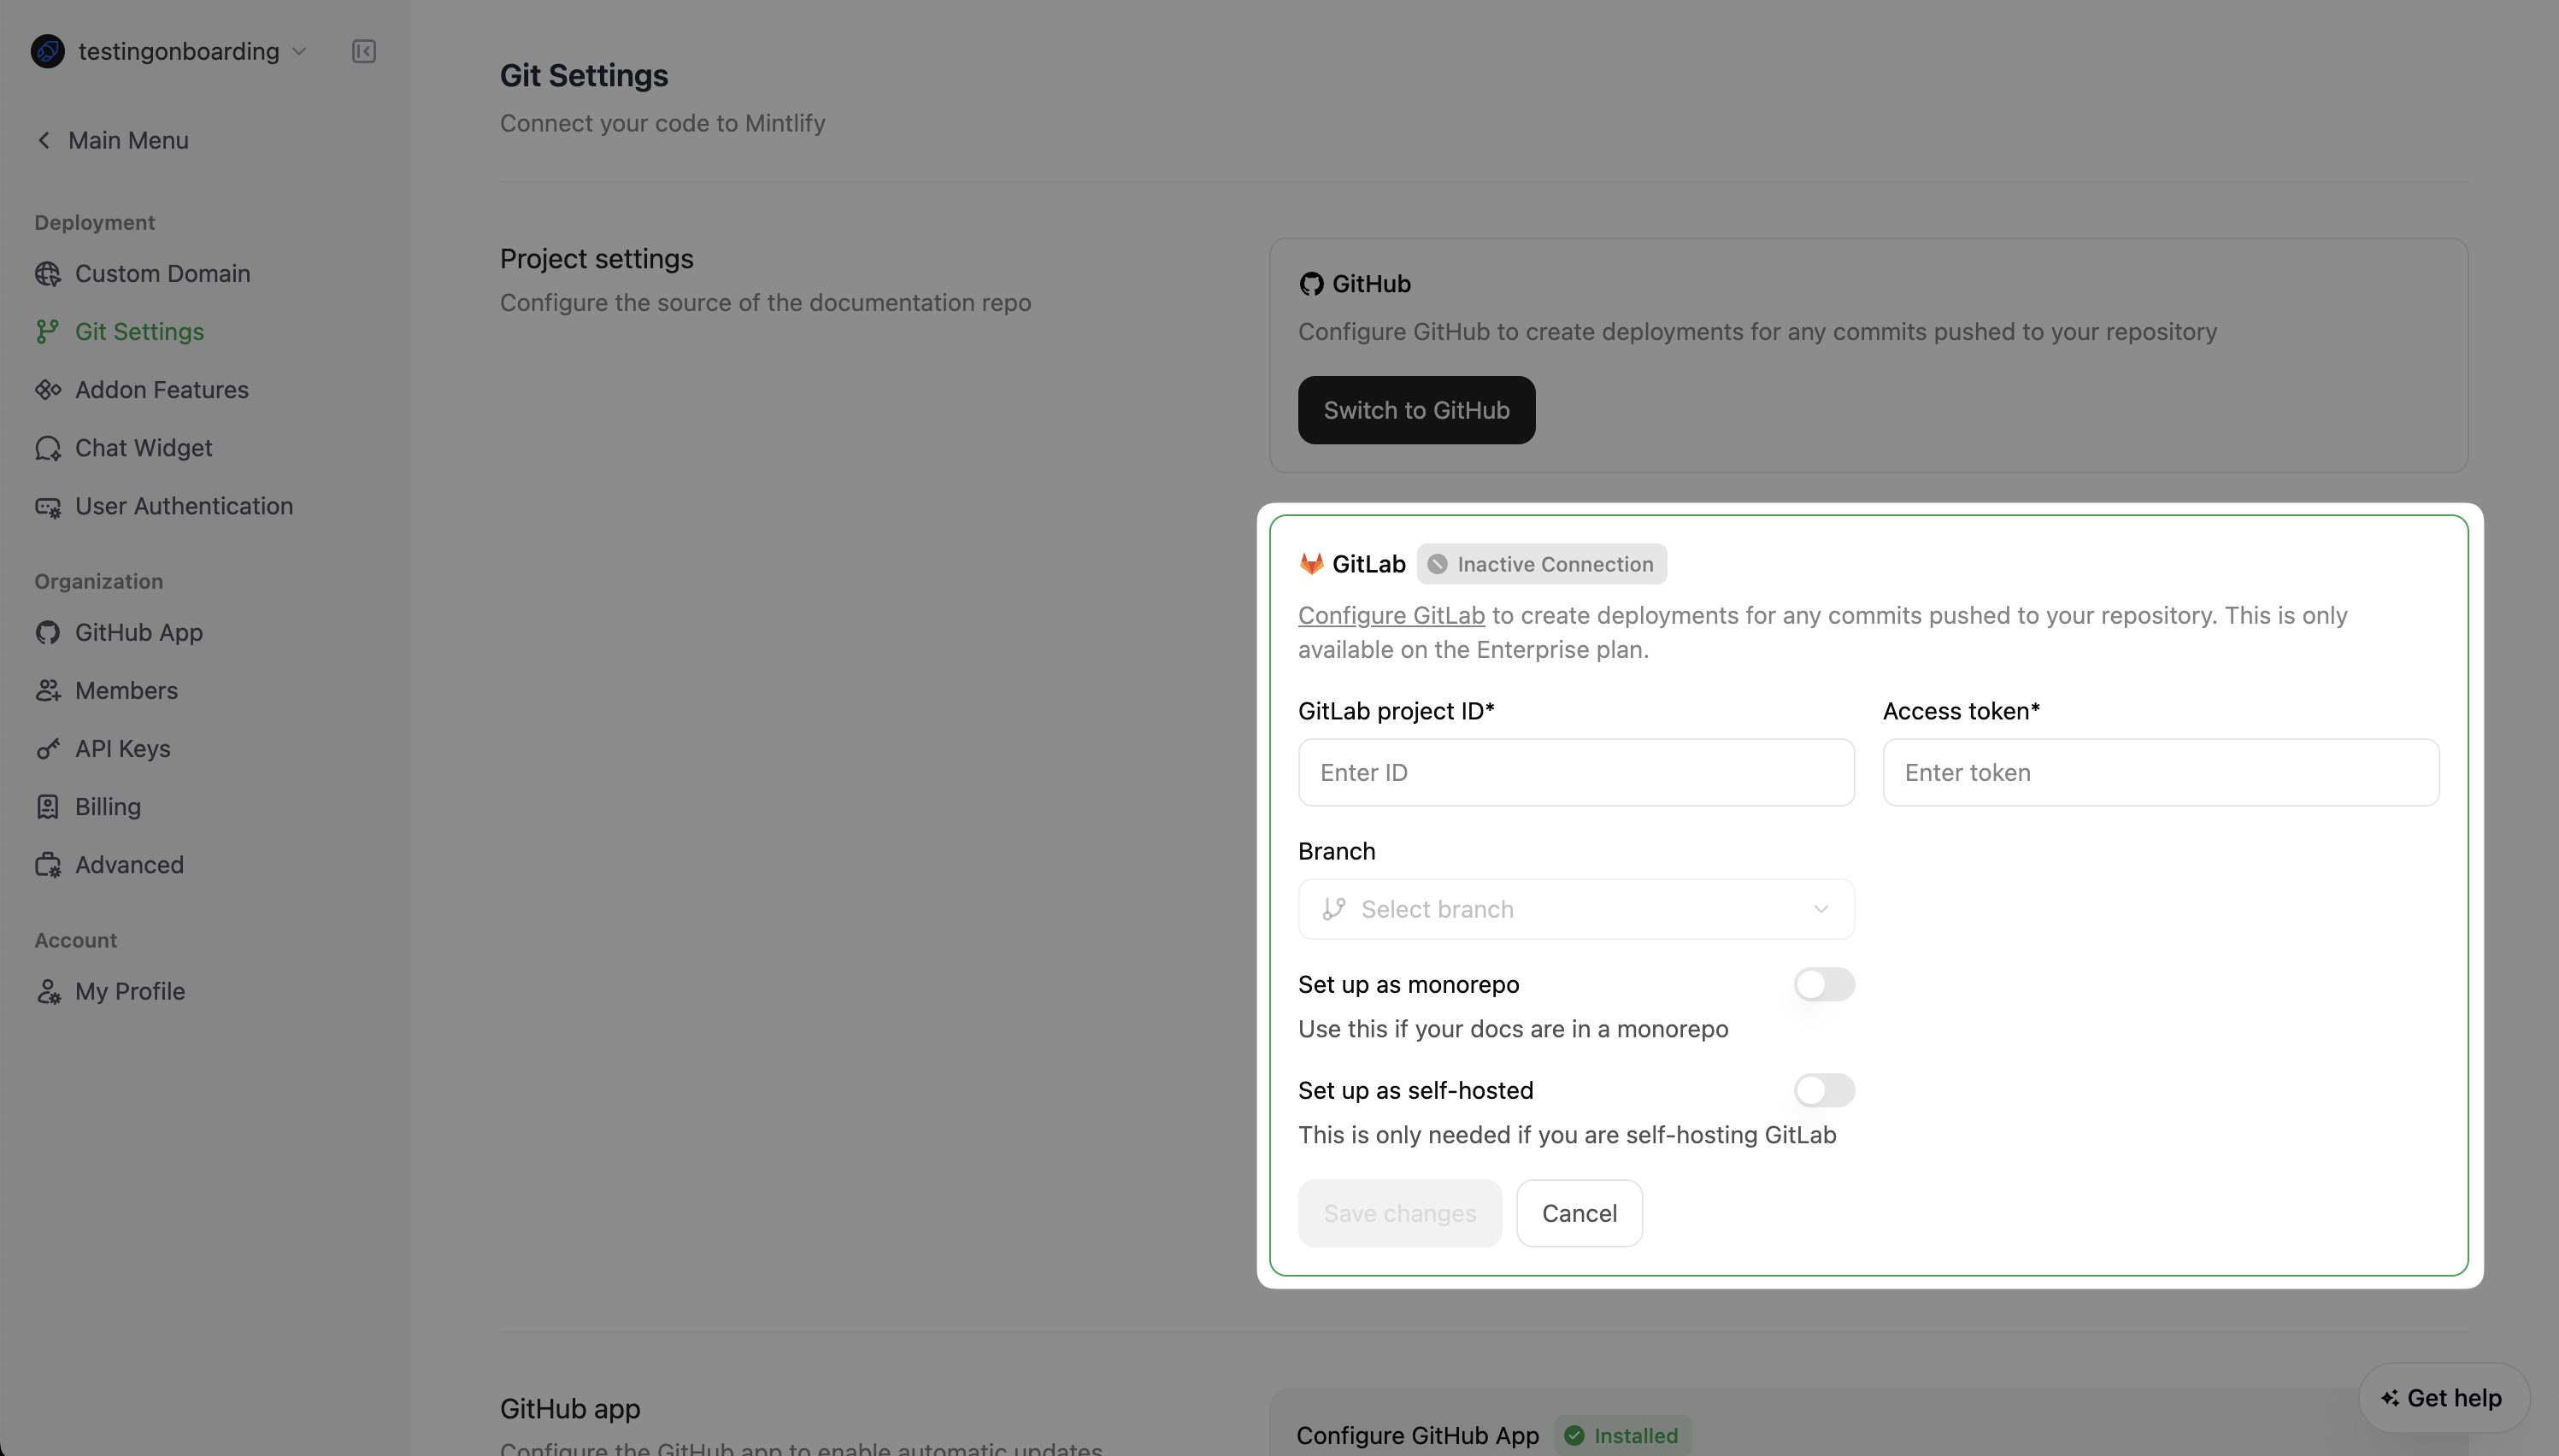
 In the [Mintlify dashboard](https://dashboard.mintlify.com/settings/deployment/git-settings):
1. Enter your project ID and access token.
2. Complete any other required configurations.
3. Click **Save Changes**.
In the [Mintlify dashboard](https://dashboard.mintlify.com/settings/deployment/git-settings):
1. Enter your project ID and access token.
2. Complete any other required configurations.
3. Click **Save Changes**.
 ## Create the webhook
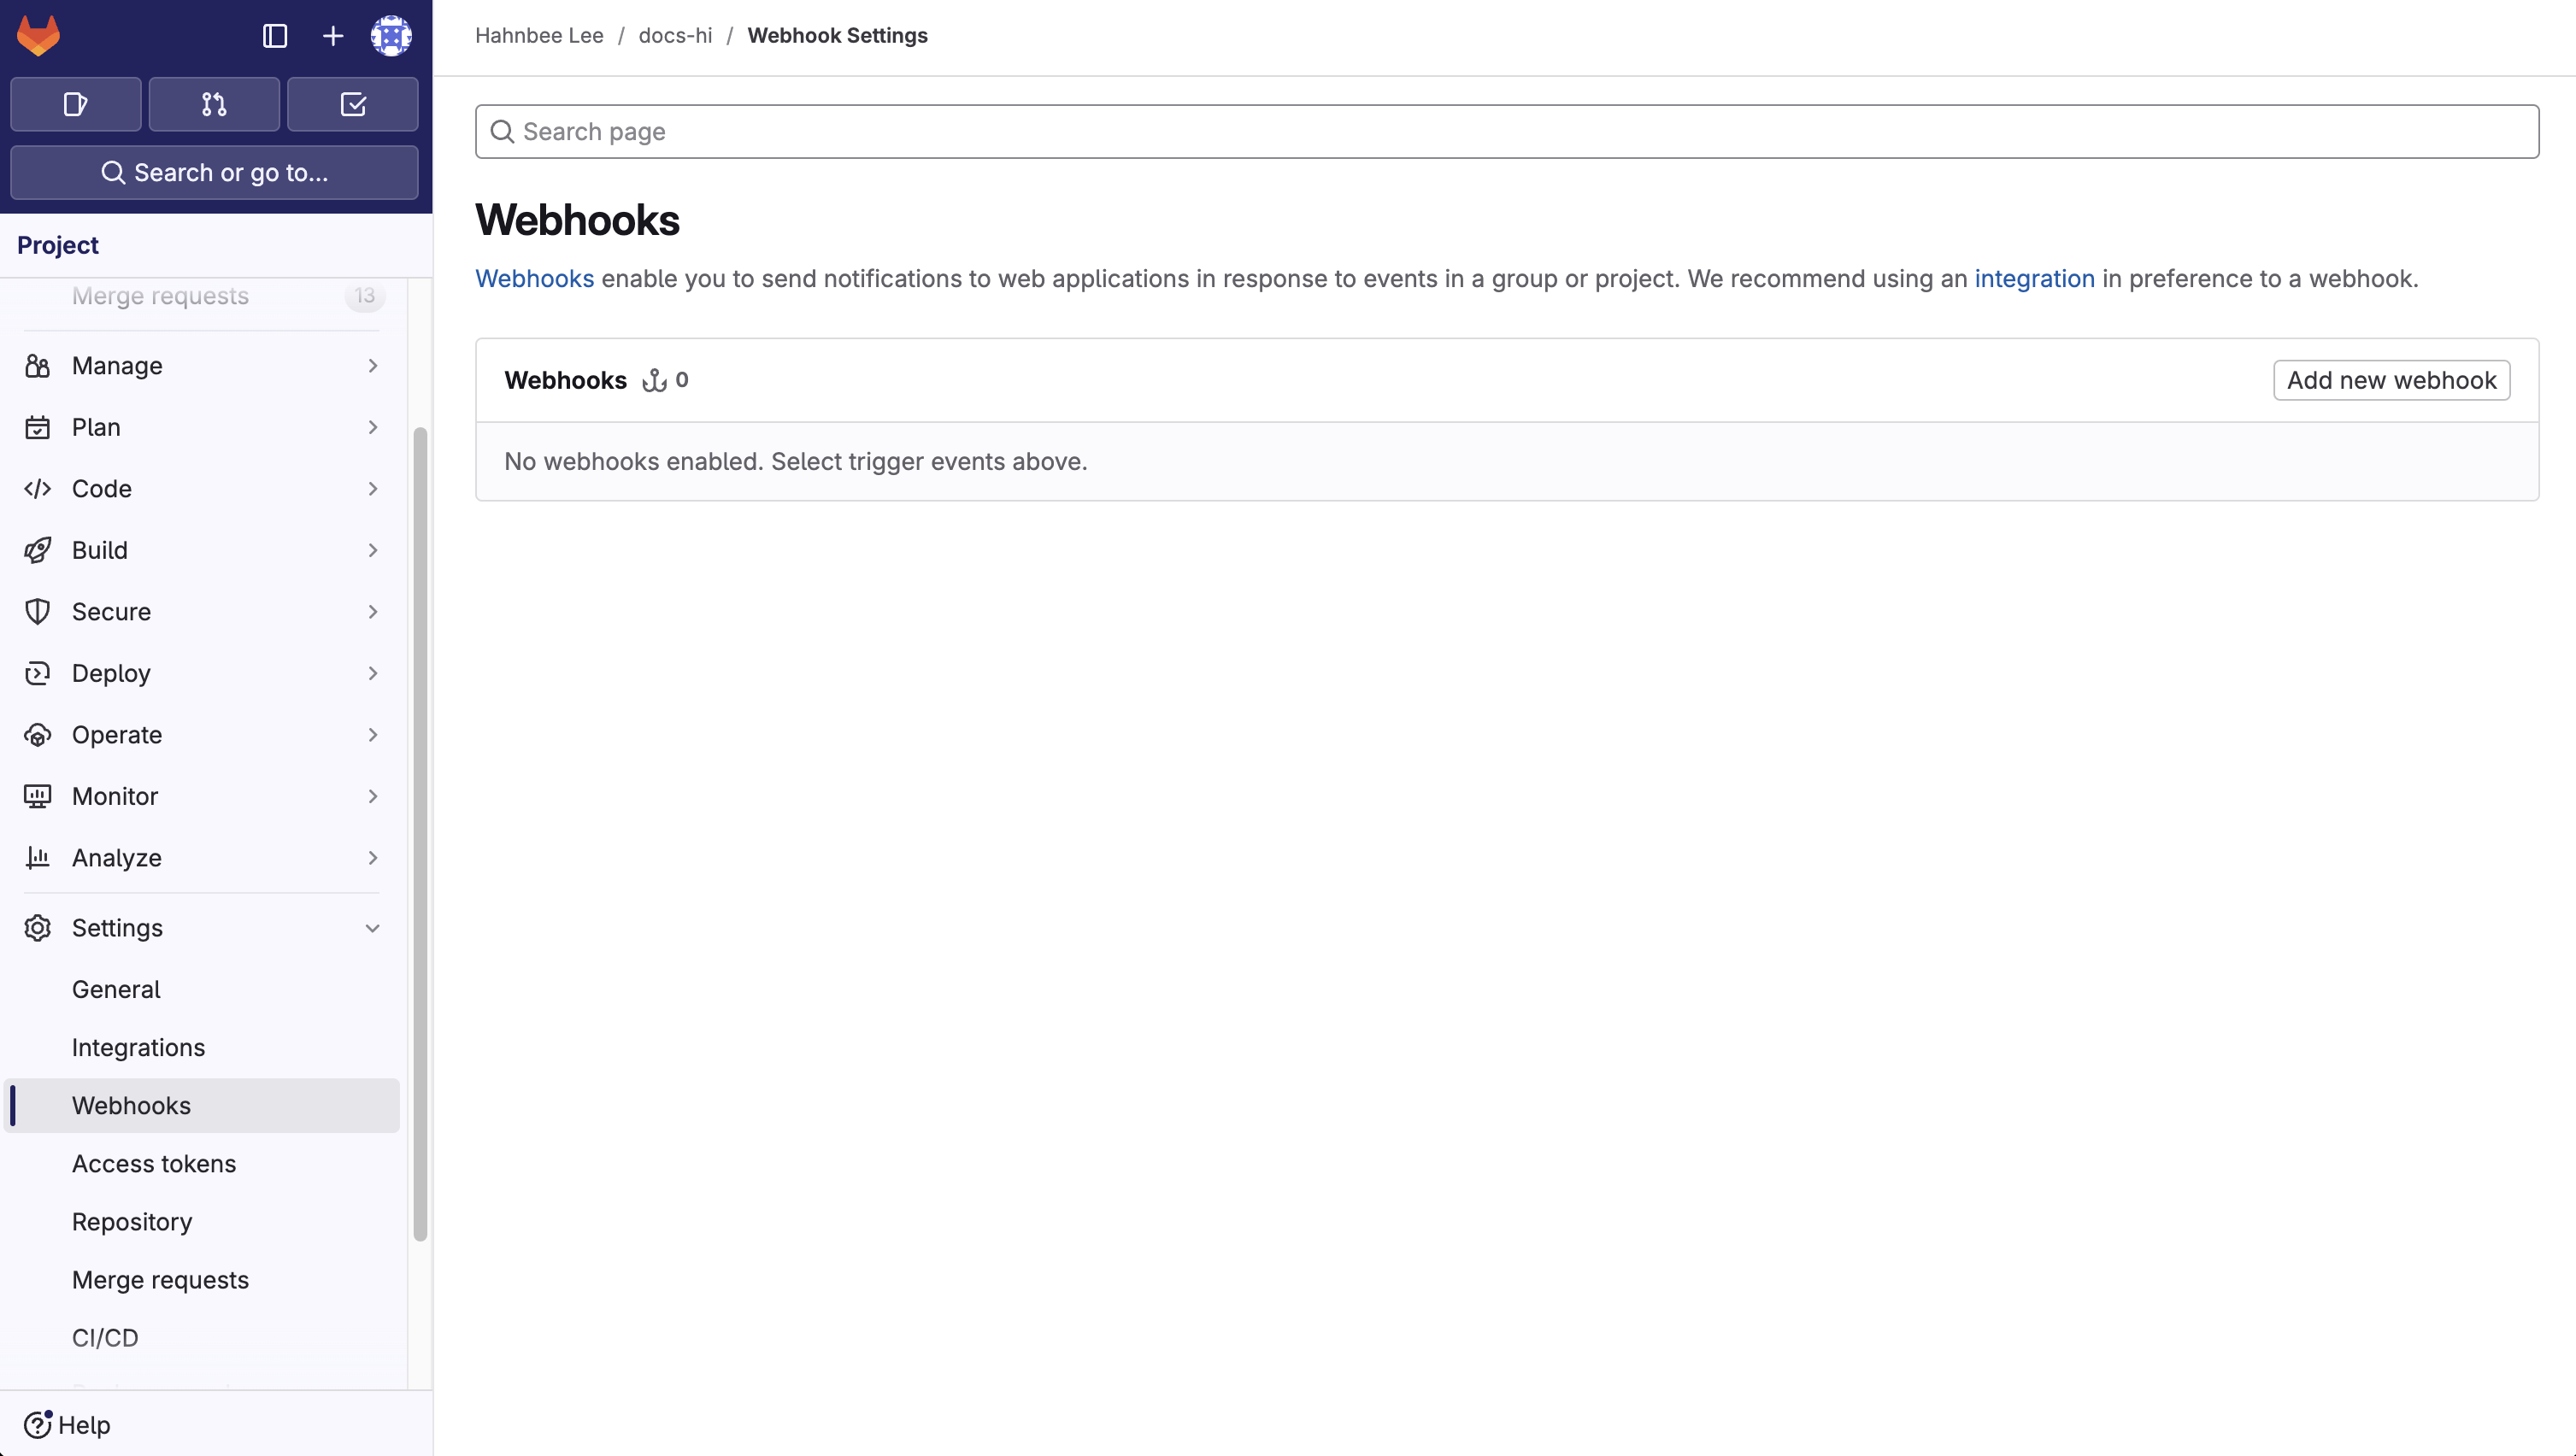
Webhooks allow us to receive events when changes are made so that we can
automatically trigger deployments.
## Create the webhook
Webhooks allow us to receive events when changes are made so that we can
automatically trigger deployments.
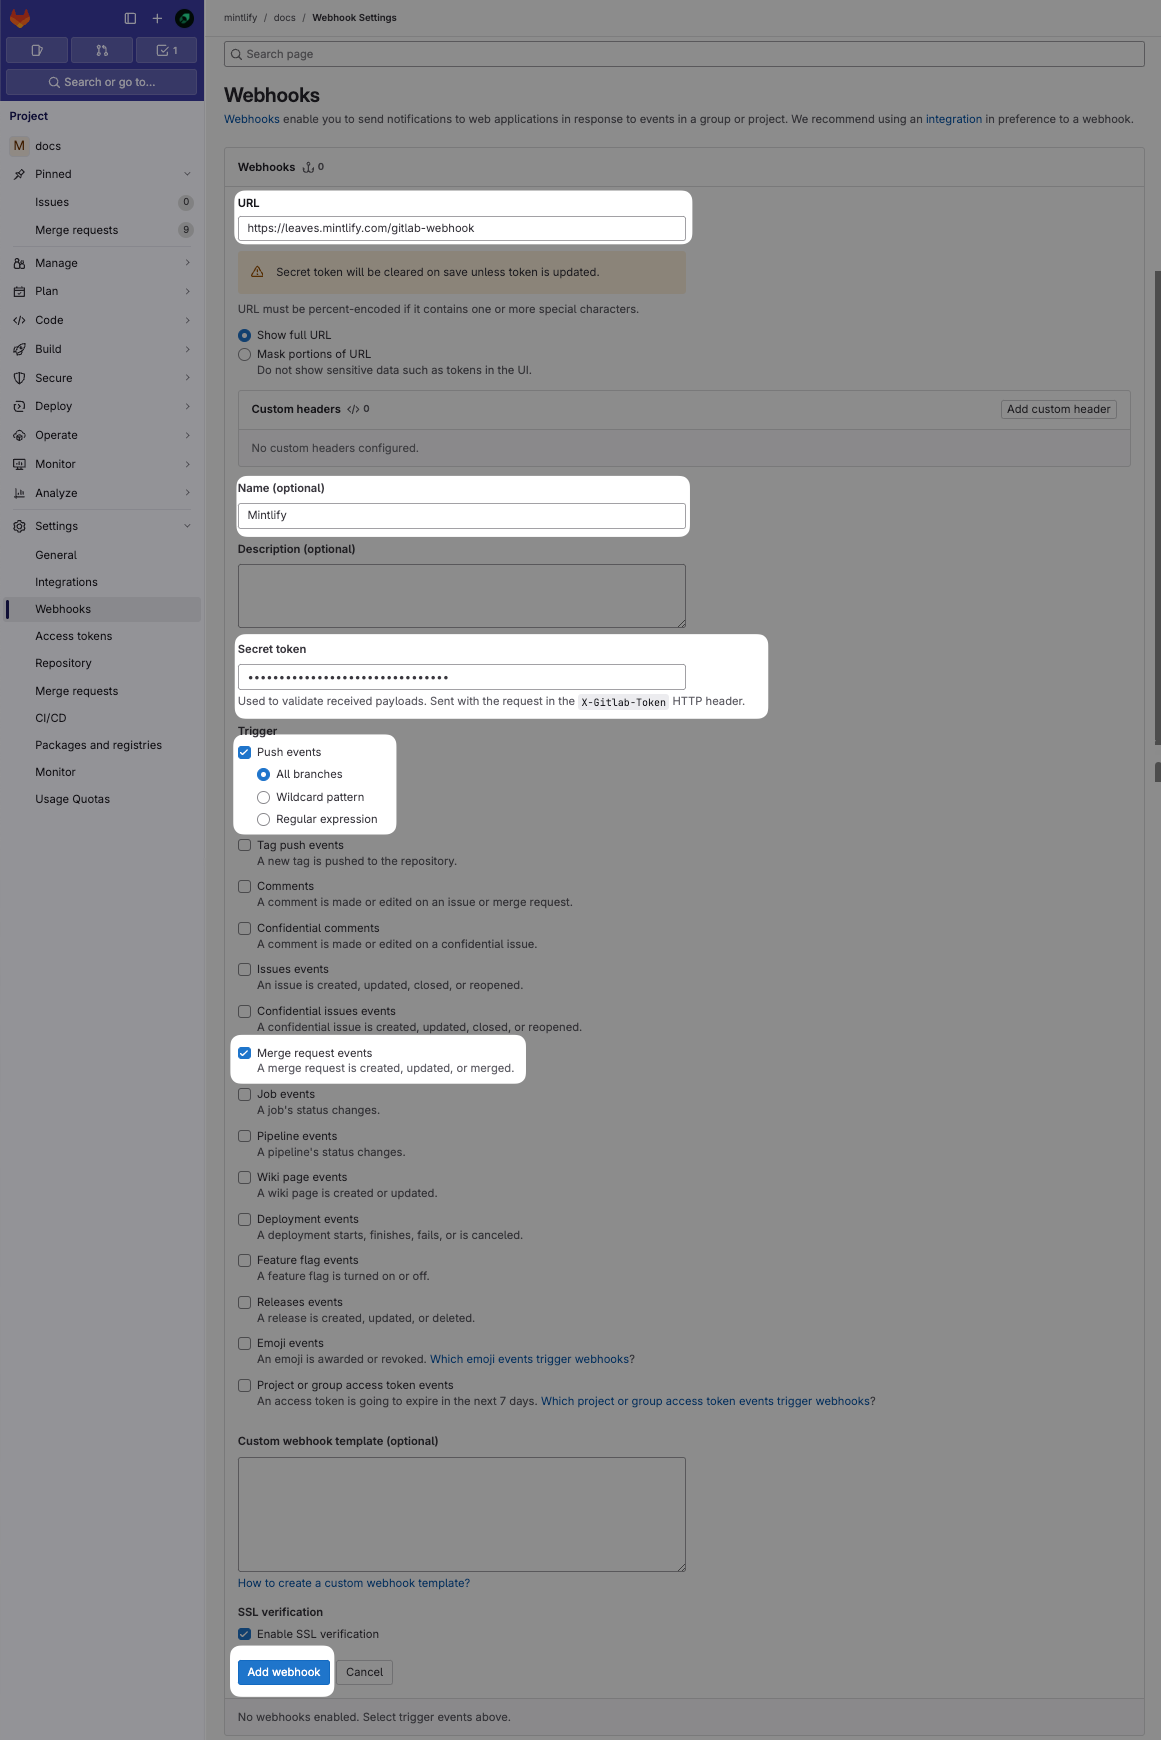
 In the "URL" field, enter the endpoint `https://leaves.mintlify.com/gitlab-webhook` and name the webhook "Mintlify".
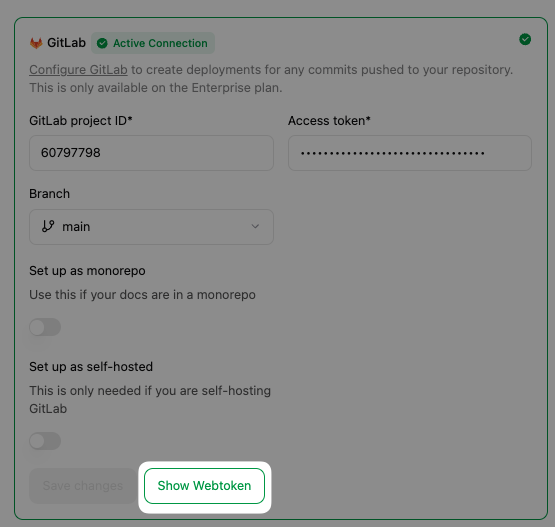
Paste the Webhook token generated after setting up the connection.
In the "URL" field, enter the endpoint `https://leaves.mintlify.com/gitlab-webhook` and name the webhook "Mintlify".
Paste the Webhook token generated after setting up the connection.
 Select these events to trigger the webhook:
* **Push events** (All branches)
* **Merge requests events**
When you're done it should look like this:
Select these events to trigger the webhook:
* **Push events** (All branches)
* **Merge requests events**
When you're done it should look like this:
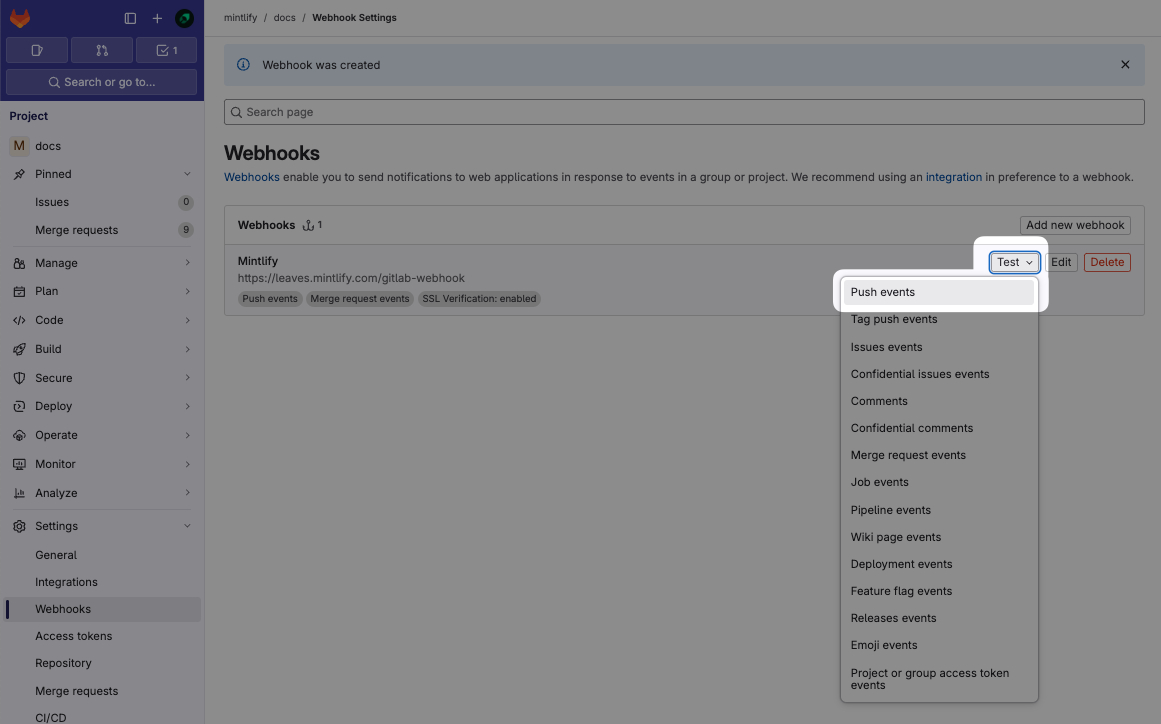
 After creating the Webhook, click the "Test" dropdown and select "Push events" to send a sample payload to ensure it's configured correctly. It'll say "Hook executed successfully: HTTP 200" if configured correctly.
This will help you verify that everything is working correctly and that your documentation will sync properly with your GitLab repository.
After creating the Webhook, click the "Test" dropdown and select "Push events" to send a sample payload to ensure it's configured correctly. It'll say "Hook executed successfully: HTTP 200" if configured correctly.
This will help you verify that everything is working correctly and that your documentation will sync properly with your GitLab repository.