> ## Documentation Index
> Fetch the complete documentation index at: https://wiki.another-horizon.eu/llms.txt
> Use this file to discover all available pages before exploring further.
# Single sign-on (SSO)
> Set up SAML or OIDC with identity providers for team authentication.
SSO functionality is available on [Custom plans](https://mintlify.com/pricing?ref=sso).
Use single sign-on to your dashboard via SAML and OIDC. If you use Okta, Google Workspace, or Microsoft Entra, we have provider-specific documentation for setting up SSO. If you use another provider, please [contact us](mailto:support@mintlify.com).
## Okta
Under `Applications`, click to create a new app integration using SAML 2.0.
Enter the following:
* Single sign-on URL (provided by Mintlify)
* Audience URI (provided by Mintlify)
* Name ID Format: `EmailAddress`
* Attribute Statements:
| Name | Name format | Value |
| ----------- | ----------- | ---------------- |
| `firstName` | Basic | `user.firstName` |
| `lastName` | Basic | `user.lastName` |
Once the application is set up, navigate to the sign-on tab and send us the metadata URL.
We'll enable the connection from our side using this information.
Under `Applications`, click to create a new app integration using OIDC.
You should choose the `Web Application` application type.
Select the authorization code grant type and enter the Redirect URI provided by Mintlify.
Once the application is set up, navigate to the General tab and locate the client ID & client secret.
Please securely provide us with these, along with your Okta instance URL (for example, `.okta.com`). You can send these via a service like 1Password or SendSafely.
## Google Workspace
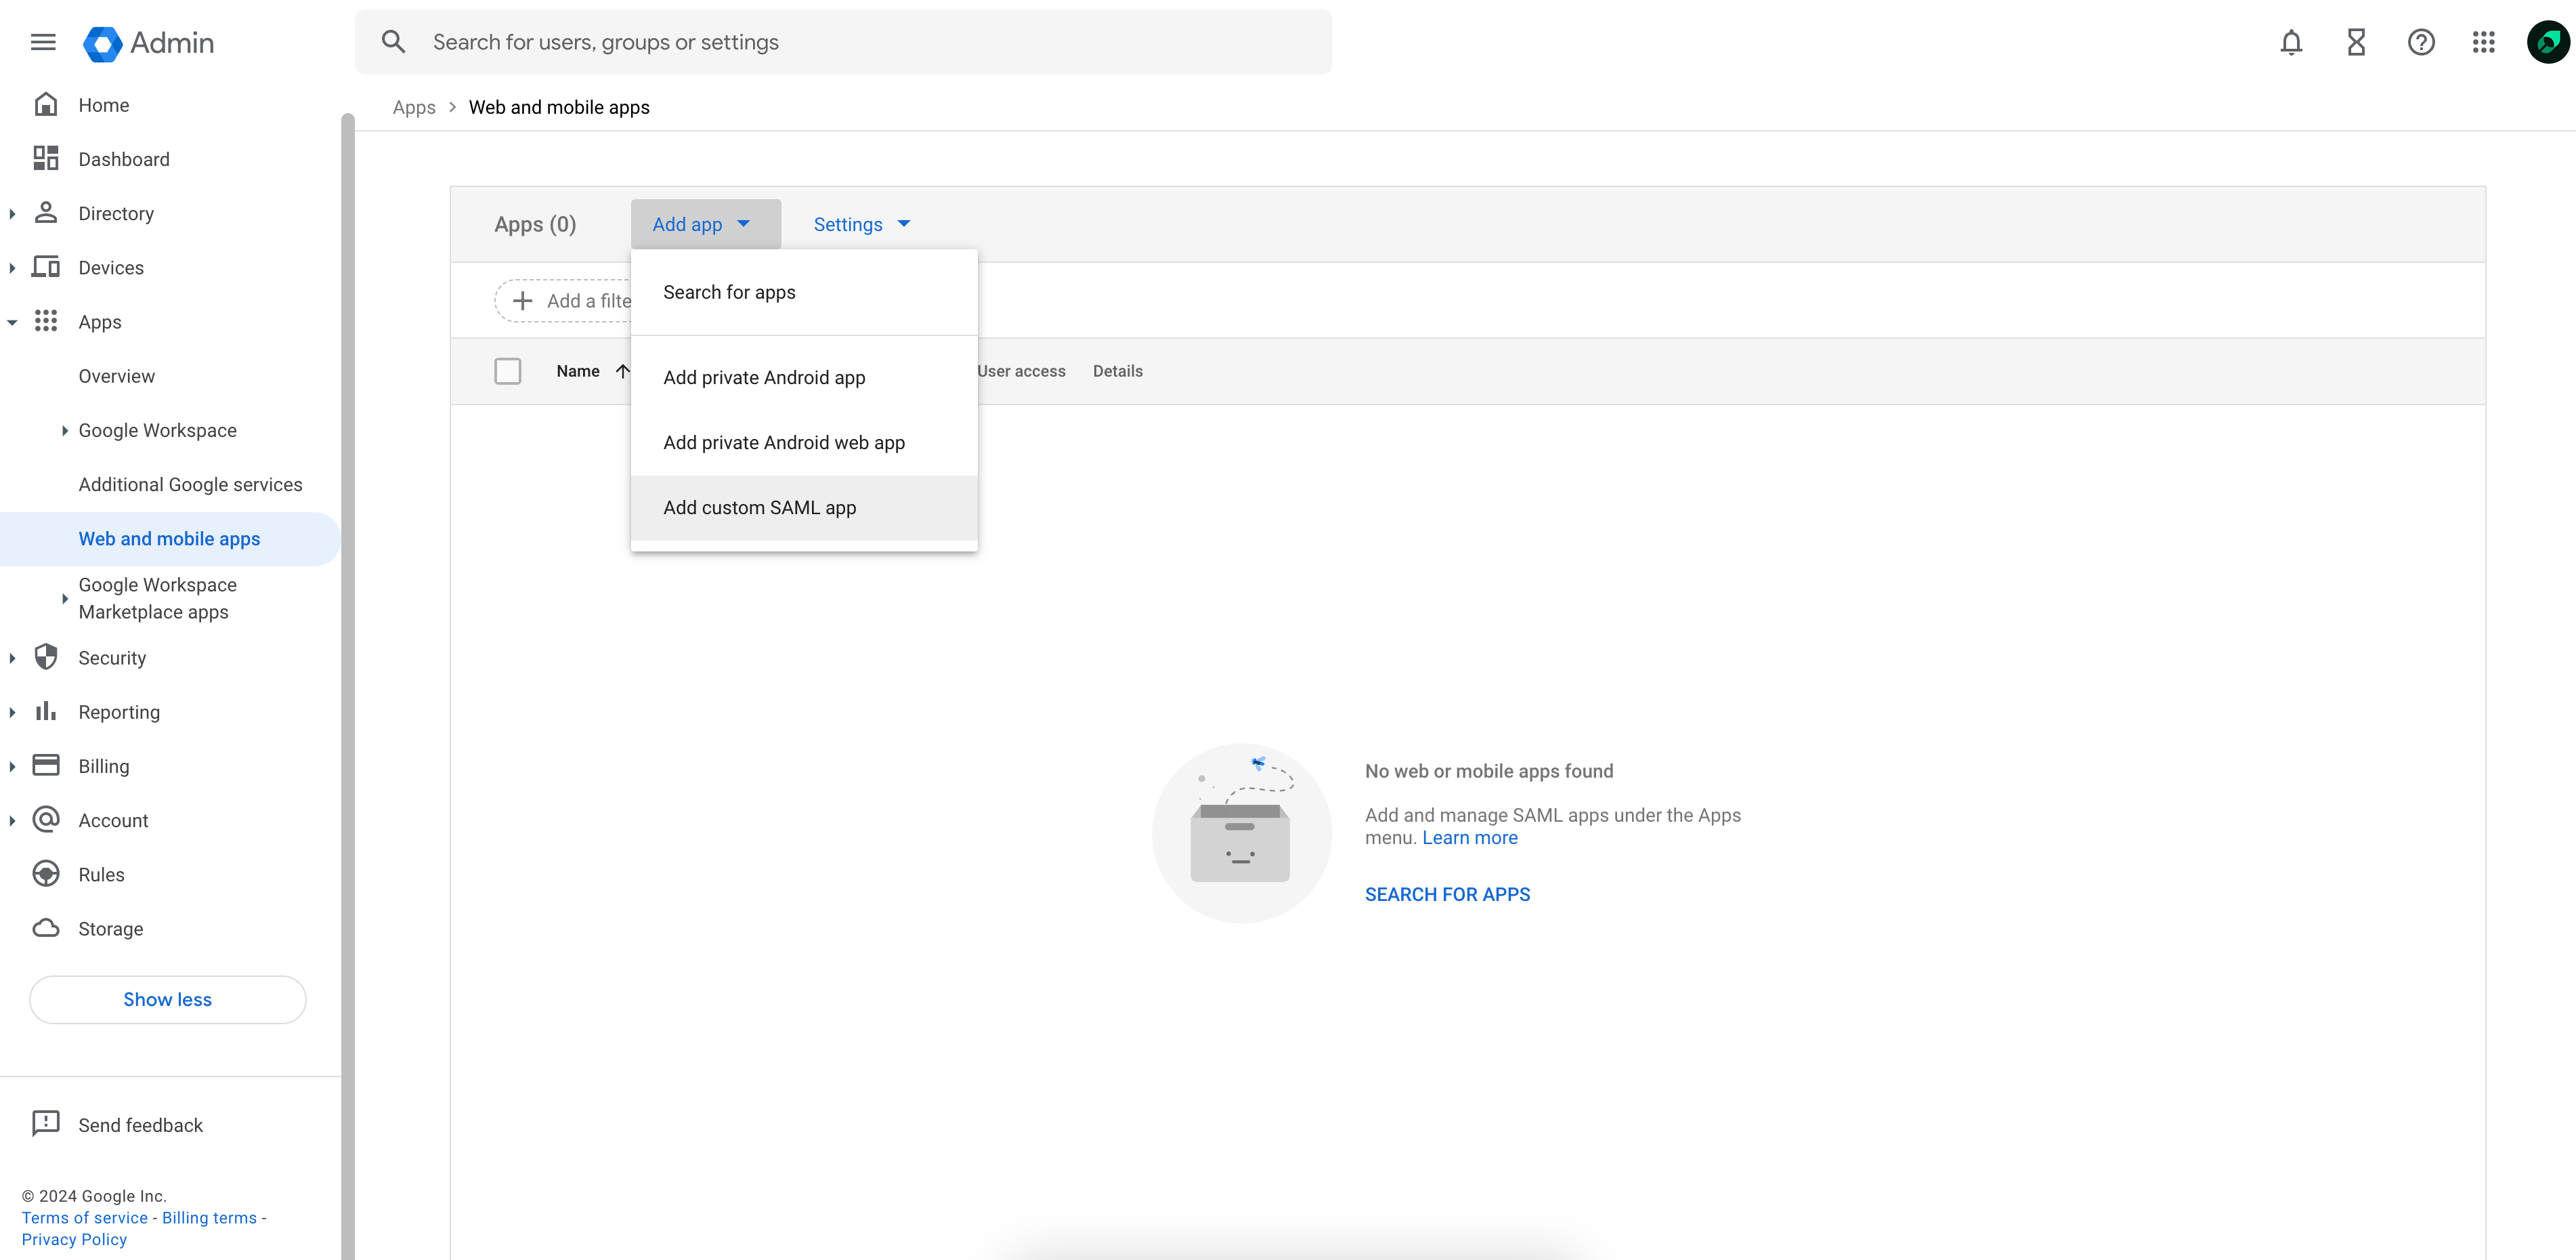
Under `Web and mobile apps`, select `Add custom SAML app` from the `Add app` dropdown.
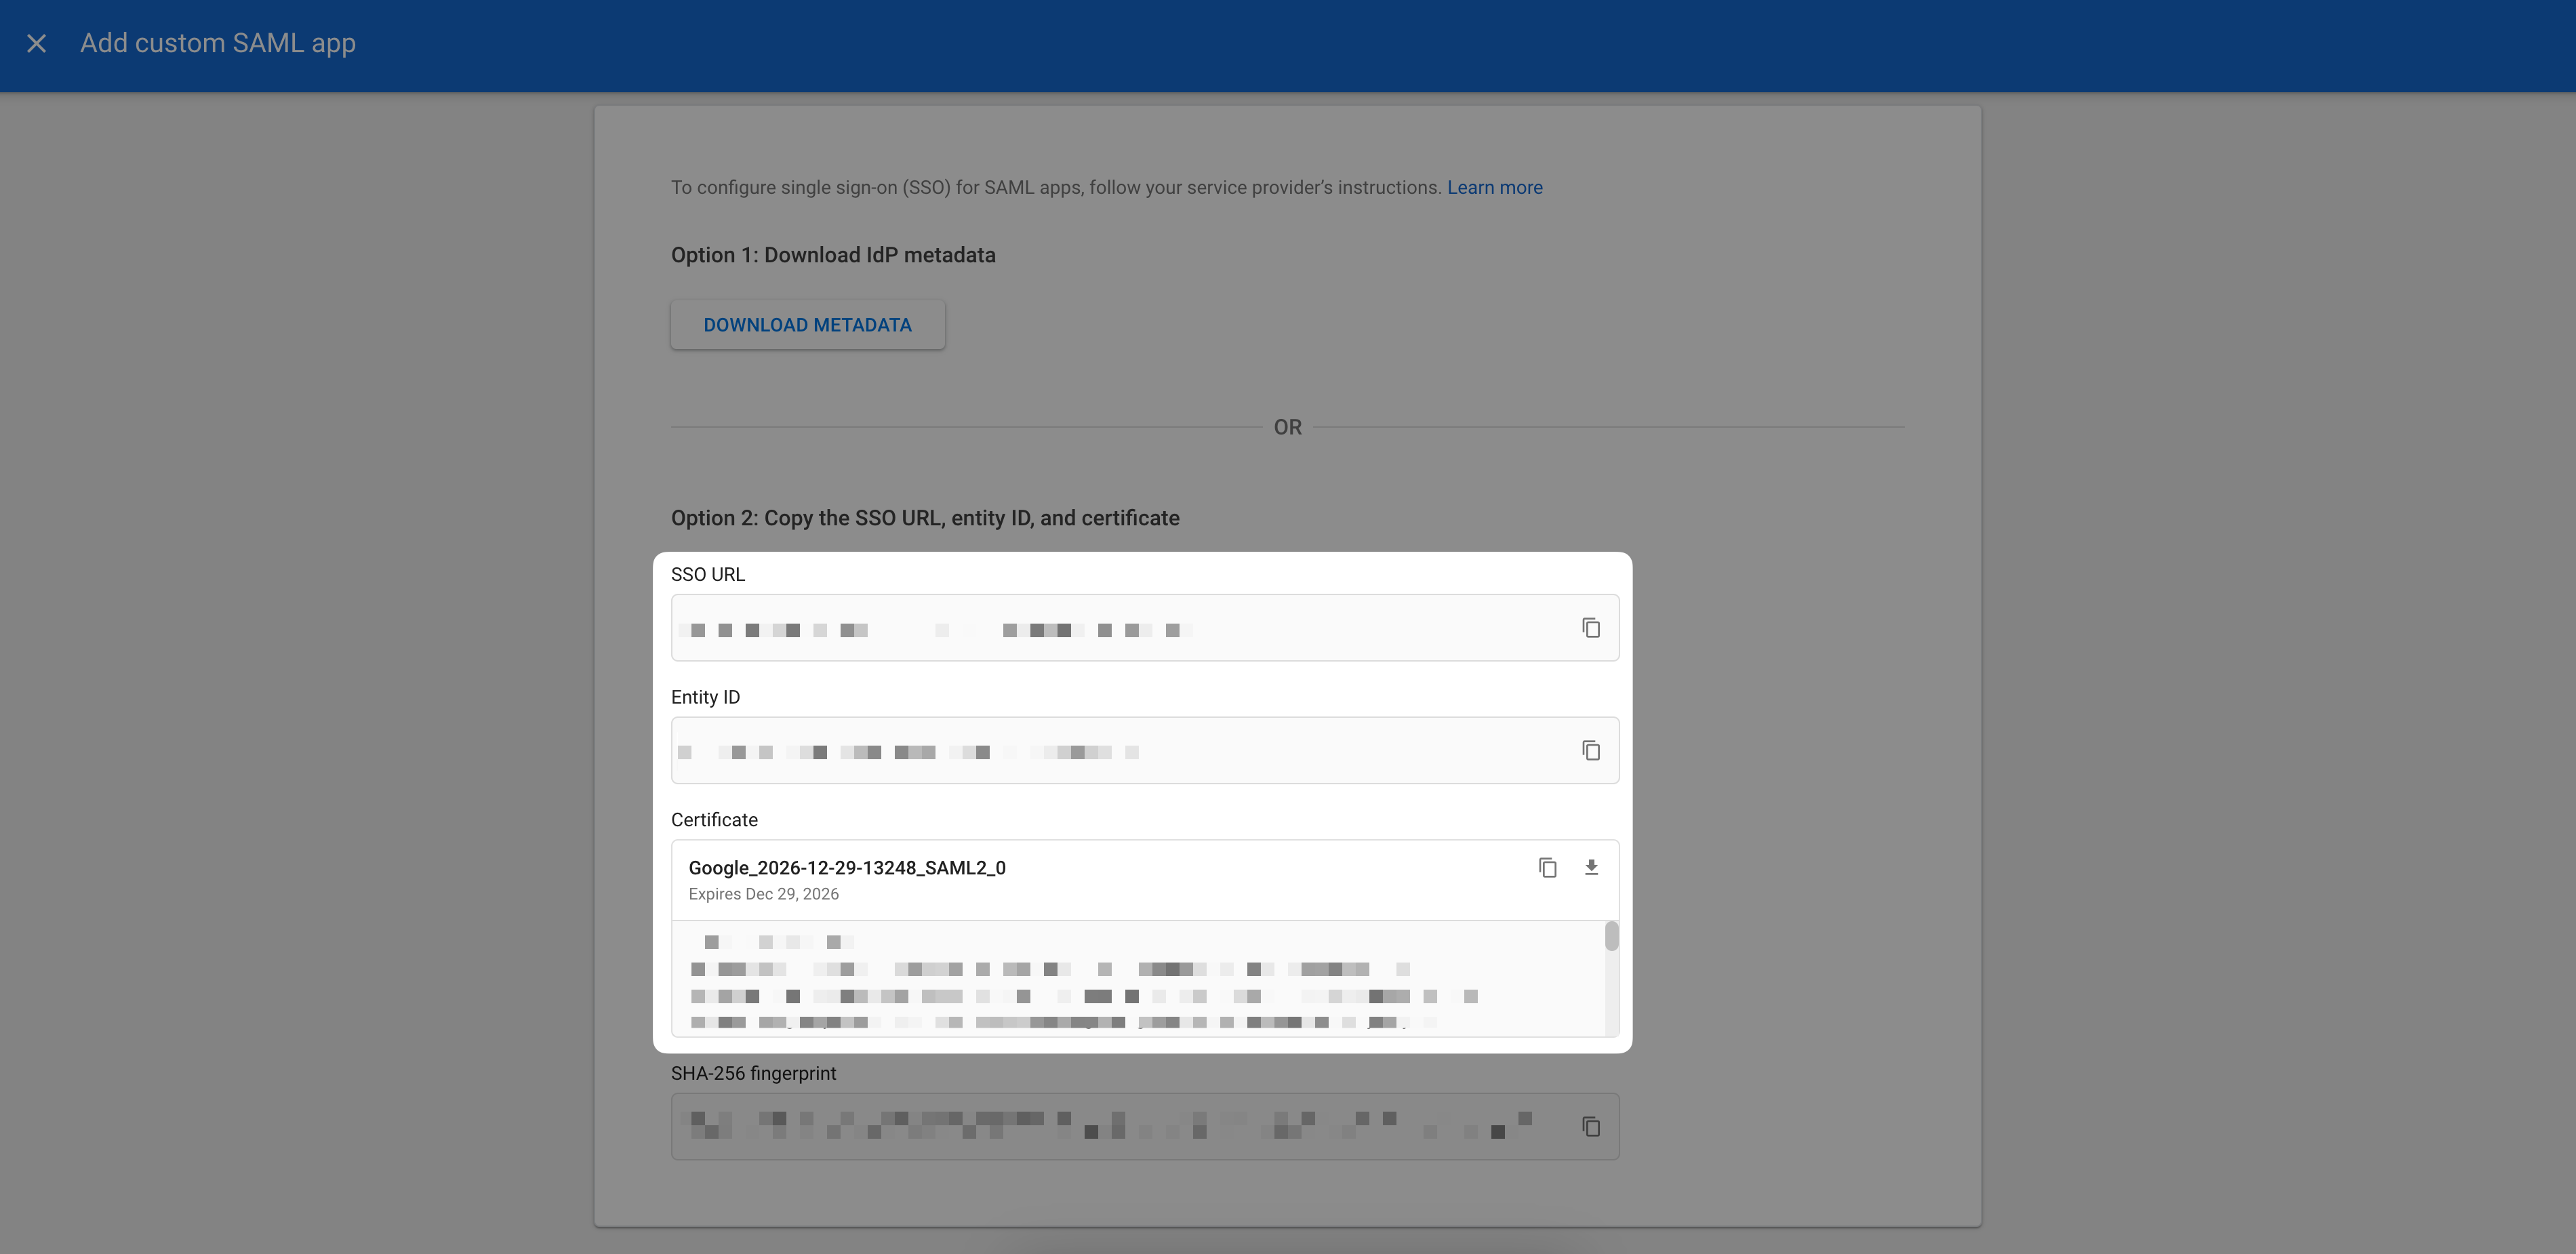
 Copy the provided SSO URL, Entity ID, and x509 certificate and send it to the Mintlify team.
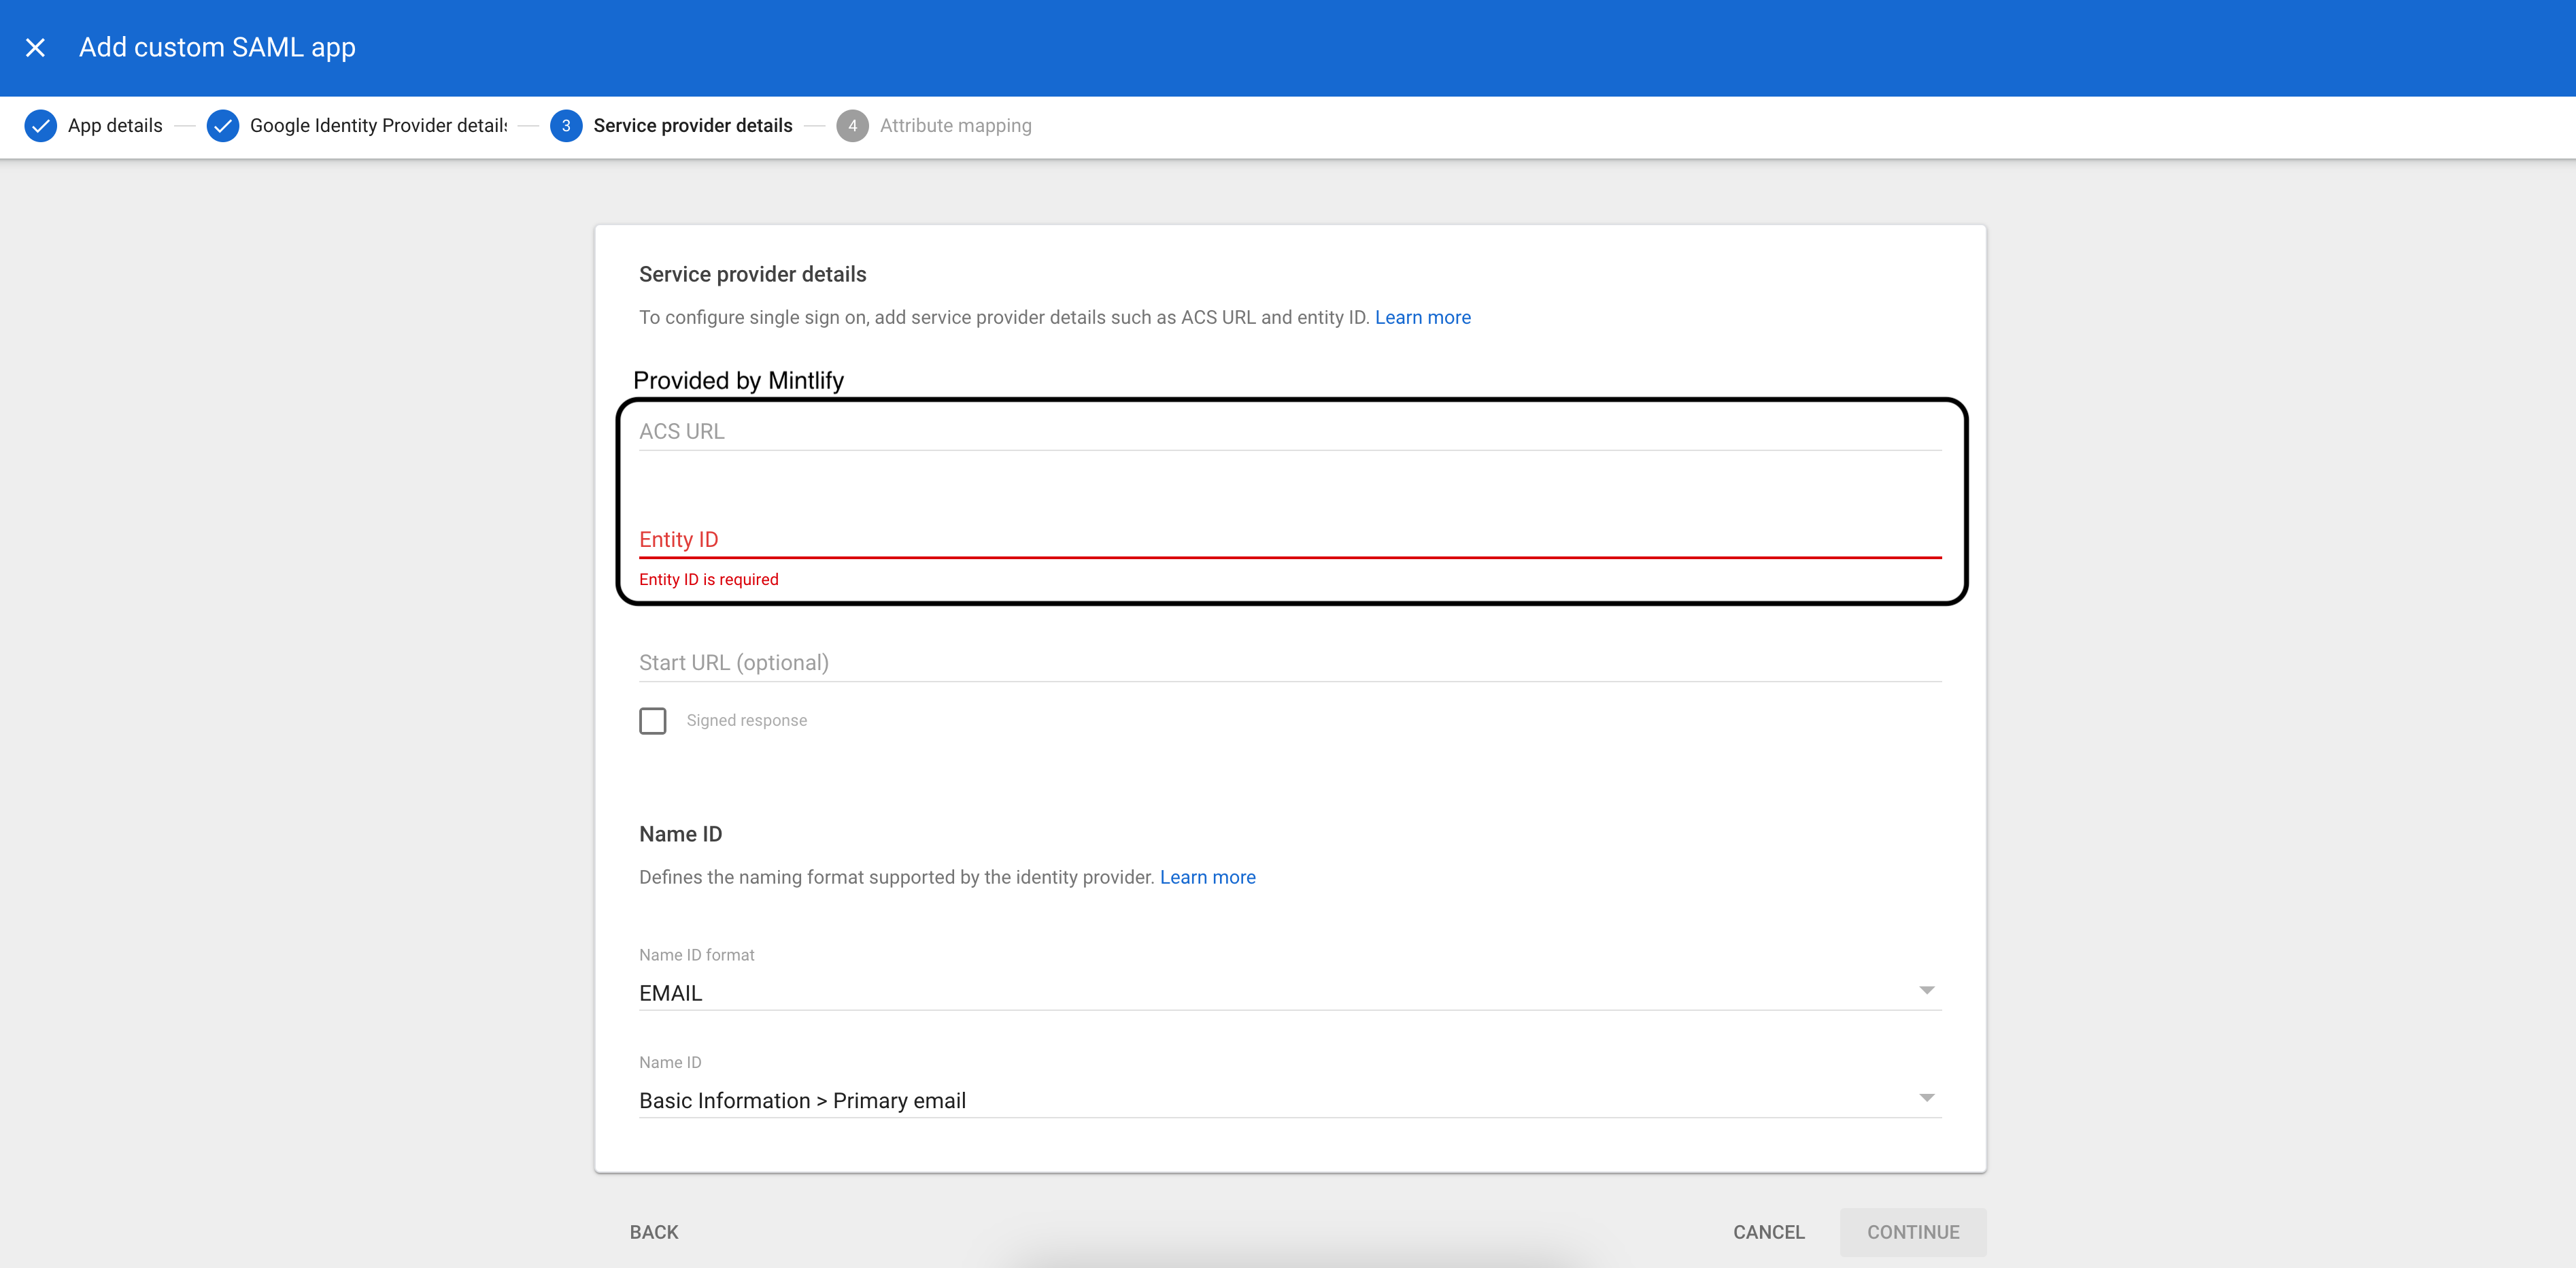
 On the Service provider details page, enter the following:
* ACS URL (provided by Mintlify)
* Entity ID (provided by Mintlify)
* Name ID format: `EMAIL`
* Name ID: `Basic Information > Primary email`
On the Service provider details page, enter the following:
* ACS URL (provided by Mintlify)
* Entity ID (provided by Mintlify)
* Name ID format: `EMAIL`
* Name ID: `Basic Information > Primary email`
 On the next page, enter the following attribute statements:
| Google Directory Attribute | App Attribute |
| -------------------------- | ------------- |
| `First name` | `firstName` |
| `Last name` | `lastName` |
Once this step is complete and users are assigned to the application, let our team know and we'll enable SSO for your account!
## Microsoft Entra
1. Under "Enterprise applications," select **New application**.
2. Select **Create your own application** and choose "Integrate any other application you don't find in the gallery (Non-gallery)."
Navigate to the Single Sign-On setup page and select **SAML**. Under "Basic SAML Configuration," enter the following:
* Identifier (Entity ID): The Audience URI provided by Mintlify.
* Reply URL (Assertion Consumer Service URL): The ACS URL provided by Mintlify.
Leave the other values blank and select **Save**.
Edit the Attributes & Claims section:
1. Select **Unique User Identifier (Name ID)** under "Required Claim."
2. Change the Source attribute to use `user.primaryauthoritativeemail`.
3. Under Additional claims, create the following claims:
| Name | Value |
| ----------- | ---------------- |
| `firstName` | `user.givenname` |
| `lastName` | `user.surname` |
Once the application is set up, navigate to the "SAML Certificates" section and send us the App Federation Metadata URL.
We'll enable the connection from our side using this information.
Navigate to "Users and groups" in your Entra application and add the users who should have access to your dashboard.
On the next page, enter the following attribute statements:
| Google Directory Attribute | App Attribute |
| -------------------------- | ------------- |
| `First name` | `firstName` |
| `Last name` | `lastName` |
Once this step is complete and users are assigned to the application, let our team know and we'll enable SSO for your account!
## Microsoft Entra
1. Under "Enterprise applications," select **New application**.
2. Select **Create your own application** and choose "Integrate any other application you don't find in the gallery (Non-gallery)."
Navigate to the Single Sign-On setup page and select **SAML**. Under "Basic SAML Configuration," enter the following:
* Identifier (Entity ID): The Audience URI provided by Mintlify.
* Reply URL (Assertion Consumer Service URL): The ACS URL provided by Mintlify.
Leave the other values blank and select **Save**.
Edit the Attributes & Claims section:
1. Select **Unique User Identifier (Name ID)** under "Required Claim."
2. Change the Source attribute to use `user.primaryauthoritativeemail`.
3. Under Additional claims, create the following claims:
| Name | Value |
| ----------- | ---------------- |
| `firstName` | `user.givenname` |
| `lastName` | `user.surname` |
Once the application is set up, navigate to the "SAML Certificates" section and send us the App Federation Metadata URL.
We'll enable the connection from our side using this information.
Navigate to "Users and groups" in your Entra application and add the users who should have access to your dashboard.