> ## Documentation Index
> Fetch the complete documentation index at: https://wiki.another-horizon.eu/llms.txt
> Use this file to discover all available pages before exploring further.
# Model Context Protocol
> Connect your documentation and API endpoints to AI tools with a hosted MCP server.
export const PreviewButton = ({children, href}) => {
return
{children}
;
};
## About MCP servers
The Model Context Protocol (MCP) is an open protocol that creates standardized connections between AI applications and external services, like documentation. Mintlify generates an MCP server from your documentation, preparing your content for the broader AI ecosystem where any MCP client (like Claude, Cursor, Goose, and others) can connect to your documentation.
Your MCP server exposes a search tool for AI applications to query your documentation.
### How MCP servers work
When an AI tool like Claude, Cursor, or ChatGPT has your documentation MCP server connected, the AI tool can search your documentation directly during response generation rather than doing a generic web search.
* The LLM can proactively search your documentation while generating a response, not just when explicitly asked.
* The LLM determines when to use the search tool based on the context of the conversation and the relevance of your documentation.
* Each tool call happens during the generation process, allowing the LLM to incorporate real-time information from your documentation into its response.
For example, if a user asks a coding question and the LLM determines that your documentation is relevant, it can search your documentation and include that information in the response without the user explicitly asking about your documentation.
## Access your MCP server
MCP servers are only available for public documentation. Documentation behind end-user authentication cannot generate an MCP server.
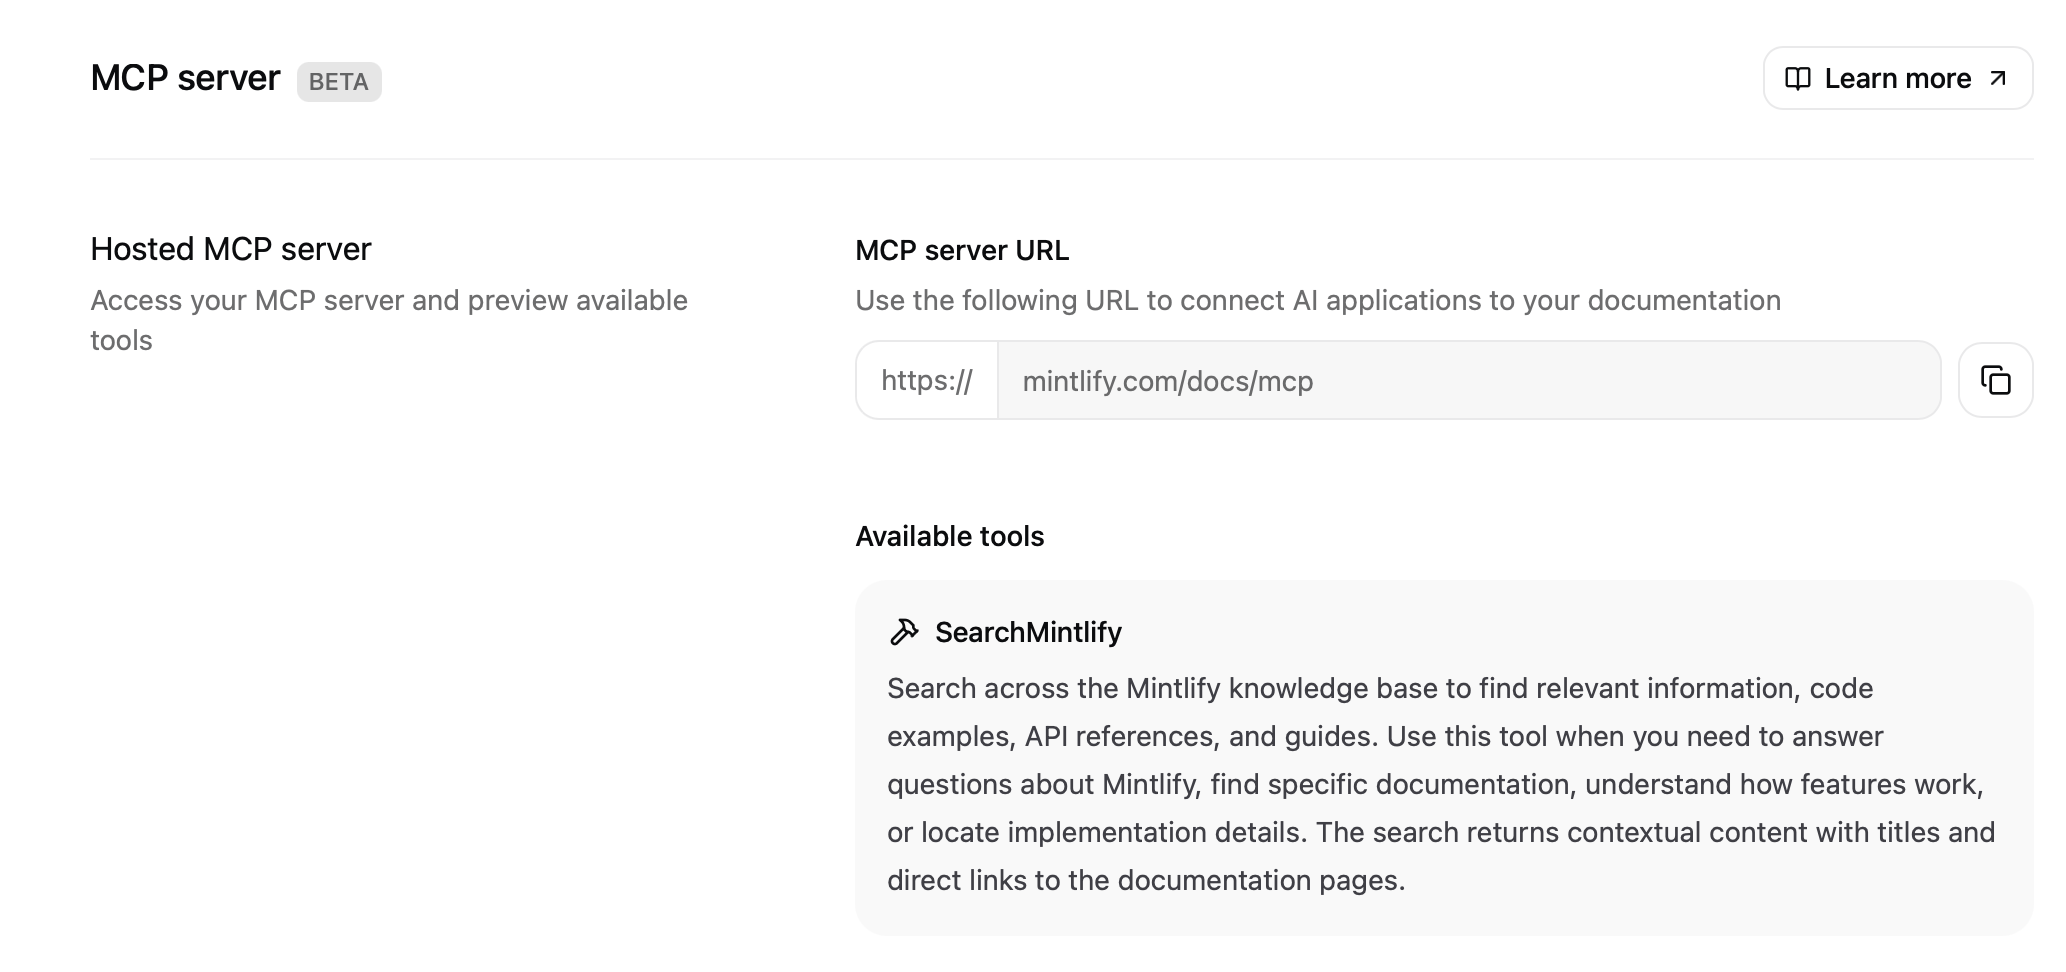
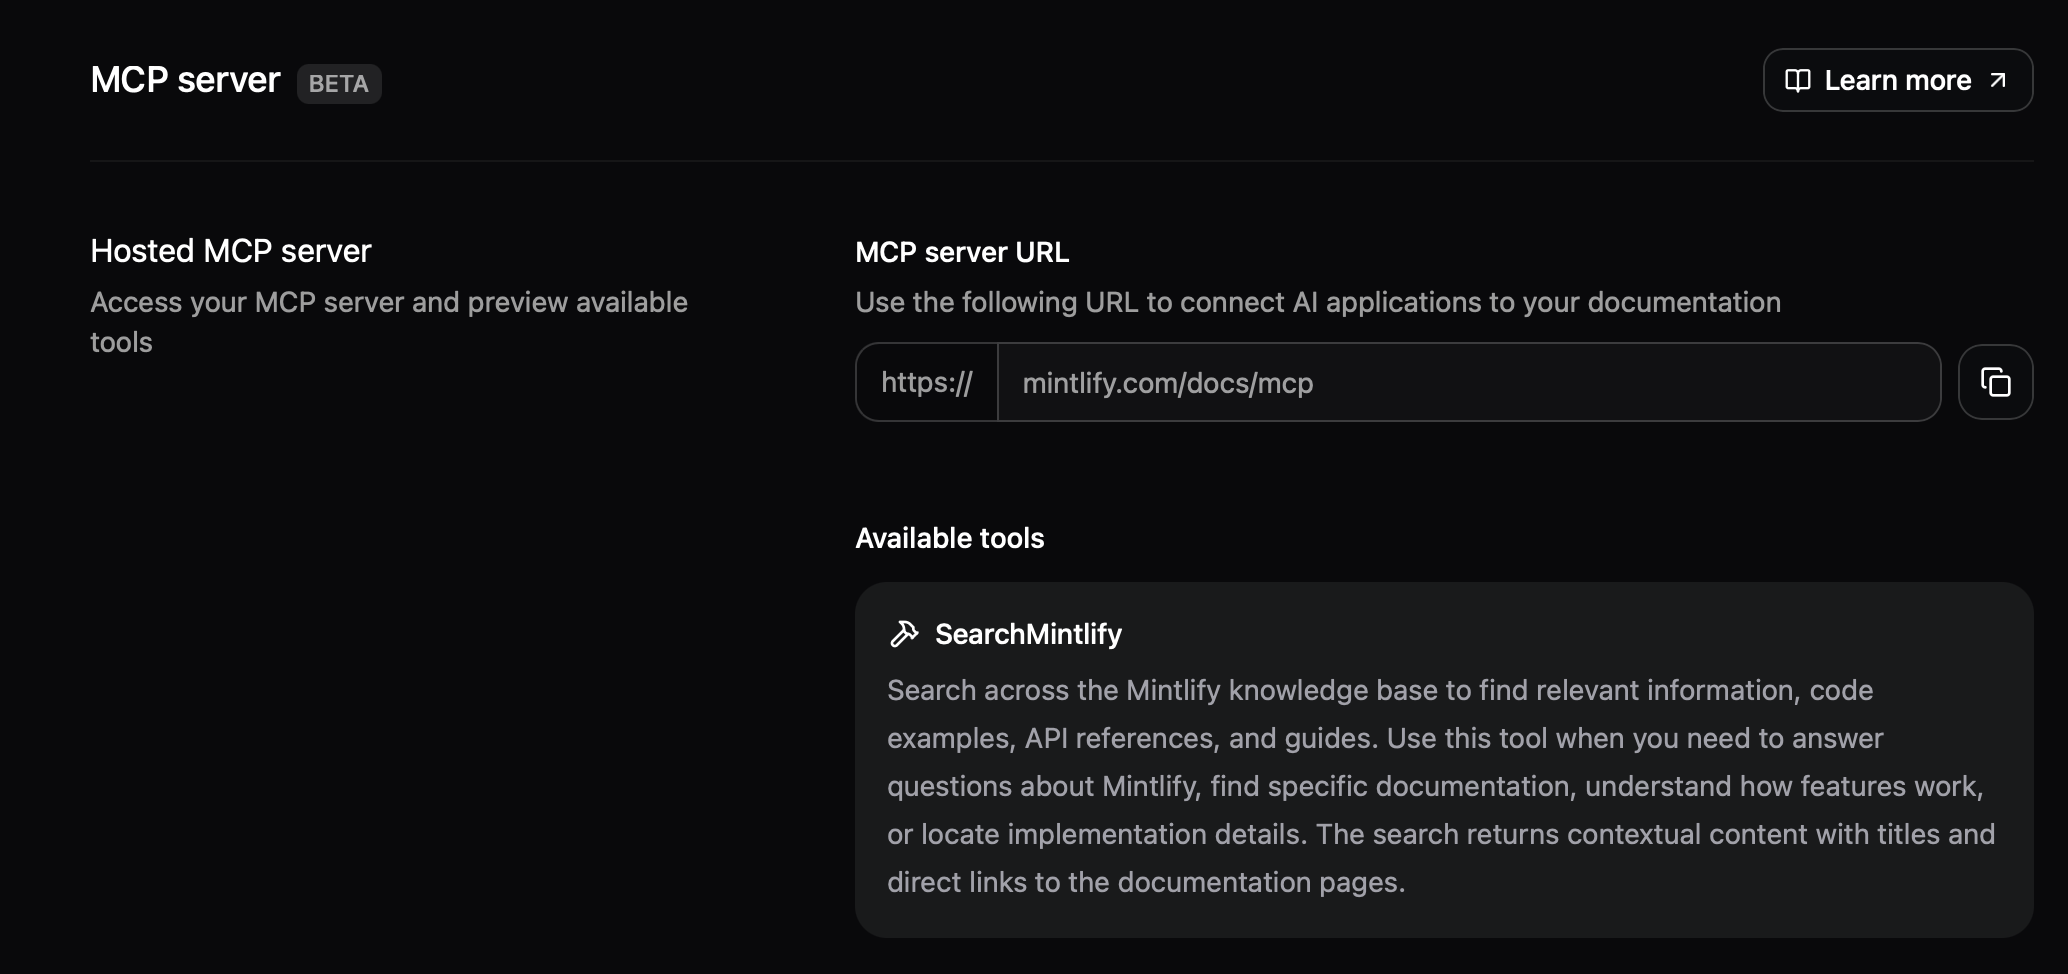
Mintlify automatically generates an MCP server for your documentation and hosts it at your documentation URL with the `/mcp` path. For example, Mintlify's MCP server is available at `https://mintlify.com/docs/mcp`.
View and copy your MCP server URL on the [MCP server page](https://dashboard.mintlify.com/products/mcp) in your dashboard.
 Hosted MCP servers use the `/mcp` path in their URLs. Other navigation elements cannot use the `/mcp` path.
## Use your MCP server
Your users must connect your MCP server to their preferred AI tools.
1. Make your MCP server URL publicly available.
2. Users copy your MCP server URL and add it to their tools.
3. Users access your documentation through their tools.
These are some of the ways you can help your users connect to your MCP server:
Add options in the [contextual menu](/ai/contextual-menu) for your users to connect to your MCP server from any page of your documentation.
| Option | Identifier | Description |
| :---------------------- | :--------- | :-------------------------------------------------- |
| **Copy MCP server URL** | `mcp` | Copies your MCP server URL to the user's clipboard. |
| **Connect to Cursor** | `cursor` | Installs your MCP server in Cursor. |
| **Connect to VS Code** | `vscode` | Installs your MCP server in VS Code. |
Navigate to your [dashboard](https://dashboard.mintlify.com/products/mcp) and find your MCP server URL.
Create a guide for your users that includes your MCP server URL and the steps to connect it to Claude.
1. Navigate to the [Connectors](https://claude.ai/settings/connectors) page in the Claude settings.
2. Select **Add custom connector**.
3. Add your MCP server name and URL.
4. Select **Add**.
5. When using Claude, select the attachments button (the plus icon).
6. Select your MCP server.
See the [Model Context Protocol documentation](https://modelcontextprotocol.io/docs/tutorials/use-remote-mcp-server#connecting-to-a-remote-mcp-server) for more details.
Navigate to your [dashboard](https://dashboard.mintlify.com/products/mcp) and find your MCP server URL.
Create a guide for your users that includes your MCP server URL and the command to connect it to Claude Code.
```bash theme={null}
claude mcp add --transport http
```
See the [Claude Code documentation](https://docs.anthropic.com/en/docs/claude-code/mcp#installing-mcp-servers) for more details.
Navigate to your [dashboard](https://dashboard.mintlify.com/products/mcp) and find your MCP server URL.
Create a guide for your users that includes your MCP server URL and the steps to connect it to Cursor.
1. Use Command + Shift + P (Ctrl + Shift + P on Windows) to open the command palette.
2. Search for "Open MCP settings".
3. Select **Add custom MCP**. This opens the `mcp.json` file.
4. In `mcp.json`, configure your server:
```json theme={null}
{
"mcpServers": {
"": {
"url": ""
}
}
}
```
See the [Cursor documentation](https://docs.cursor.com/en/context/mcp#installing-mcp-servers) for more details.
Navigate to your [dashboard](https://dashboard.mintlify.com/products/mcp) and find your MCP server URL.
Create a guide for your users that includes your MCP server URL and the steps to connect it to VS Code.
1. Create a `.vscode/mcp.json` file.
2. In `mcp.json`, configure your server:
```json theme={null}
{
"servers": {
"": {
"type": "http",
"url": ""
}
}
}
```
See the [VS Code documentation](https://code.visualstudio.com/docs/copilot/chat/mcp-servers) for more details.
### Example: Connect to the Mintlify MCP server
Connect to the Mintlify MCP server to search this documentation site within your preferred AI tool. This gives you more accurate answers about how to use Mintlify in your local environment and demonstrates how you can help your users connect to your MCP server.
At the top of this page, select the contextual menu and choose **Connect to Cursor** or **Connect to VS Code** to connect the Mintlify MCP server to the IDE of your choice.
To use the Mintlify MCP server with Claude:
1. Navigate to the [Connectors](https://claude.ai/settings/connectors) page in the Claude settings.
2. Select **Add custom connector**.
3. Add the Mintlify MCP server:
* Name: `Mintlify`
* URL: `https://mintlify.com/docs/mcp`
4. Select **Add**.
1. When using Claude, select the attachments button (the plus icon).
2. Select the Mintlify MCP server.
3. Ask Claude a question about Mintlify.
See the [Model Context Protocol documentation](https://modelcontextprotocol.io/docs/tutorials/use-remote-mcp-server#connecting-to-a-remote-mcp-server) for more details.
To use the Mintlify MCP server with Claude Code, run the following command:
```bash theme={null}
claude mcp add --transport http Mintlify https://mintlify.com/docs/mcp
```
Test the connection by running:
```bash theme={null}
claude mcp list
```
See the [Claude Code documentation](https://docs.anthropic.com/en/docs/claude-code/mcp#installing-mcp-servers) for more details.
Install in Cursor
To connect the Mintlify MCP server to Cursor, click the **Install in Cursor** button. Or to manually connect the MCP server, follow these steps:
1. Use Command + Shift + P (Ctrl + Shift + P on Windows) to open the command palette.
2. Search for "Open MCP settings".
3. Select **Add custom MCP**. This opens the `mcp.json` file.
In `mcp.json`, add:
```json theme={null}
{
"mcpServers": {
"Mintlify": {
"url": "https://mintlify.com/docs/mcp"
}
}
}
```
In Cursor's chat, ask "What tools do you have available?" Cursor should show the Mintlify MCP server as an available tool.
See [Installing MCP servers](https://docs.cursor.com/en/context/mcp#installing-mcp-servers) in the Cursor documentation for more details.
Install in VS Code
To connect the Mintlify MCP server to VS Code, click the **Install in VS Code** button. Or to manually connect the MCP server, create a `.vscode/mcp.json` file and add:
```json theme={null}
{
"servers": {
"Mintlify": {
"type": "http",
"url": "https://mintlify.com/docs/mcp"
}
}
}
```
See the [VS Code documentation](https://code.visualstudio.com/docs/copilot/chat/mcp-servers) for more details.
Hosted MCP servers use the `/mcp` path in their URLs. Other navigation elements cannot use the `/mcp` path.
## Use your MCP server
Your users must connect your MCP server to their preferred AI tools.
1. Make your MCP server URL publicly available.
2. Users copy your MCP server URL and add it to their tools.
3. Users access your documentation through their tools.
These are some of the ways you can help your users connect to your MCP server:
Add options in the [contextual menu](/ai/contextual-menu) for your users to connect to your MCP server from any page of your documentation.
| Option | Identifier | Description |
| :---------------------- | :--------- | :-------------------------------------------------- |
| **Copy MCP server URL** | `mcp` | Copies your MCP server URL to the user's clipboard. |
| **Connect to Cursor** | `cursor` | Installs your MCP server in Cursor. |
| **Connect to VS Code** | `vscode` | Installs your MCP server in VS Code. |
Navigate to your [dashboard](https://dashboard.mintlify.com/products/mcp) and find your MCP server URL.
Create a guide for your users that includes your MCP server URL and the steps to connect it to Claude.
1. Navigate to the [Connectors](https://claude.ai/settings/connectors) page in the Claude settings.
2. Select **Add custom connector**.
3. Add your MCP server name and URL.
4. Select **Add**.
5. When using Claude, select the attachments button (the plus icon).
6. Select your MCP server.
See the [Model Context Protocol documentation](https://modelcontextprotocol.io/docs/tutorials/use-remote-mcp-server#connecting-to-a-remote-mcp-server) for more details.
Navigate to your [dashboard](https://dashboard.mintlify.com/products/mcp) and find your MCP server URL.
Create a guide for your users that includes your MCP server URL and the command to connect it to Claude Code.
```bash theme={null}
claude mcp add --transport http
```
See the [Claude Code documentation](https://docs.anthropic.com/en/docs/claude-code/mcp#installing-mcp-servers) for more details.
Navigate to your [dashboard](https://dashboard.mintlify.com/products/mcp) and find your MCP server URL.
Create a guide for your users that includes your MCP server URL and the steps to connect it to Cursor.
1. Use Command + Shift + P (Ctrl + Shift + P on Windows) to open the command palette.
2. Search for "Open MCP settings".
3. Select **Add custom MCP**. This opens the `mcp.json` file.
4. In `mcp.json`, configure your server:
```json theme={null}
{
"mcpServers": {
"": {
"url": ""
}
}
}
```
See the [Cursor documentation](https://docs.cursor.com/en/context/mcp#installing-mcp-servers) for more details.
Navigate to your [dashboard](https://dashboard.mintlify.com/products/mcp) and find your MCP server URL.
Create a guide for your users that includes your MCP server URL and the steps to connect it to VS Code.
1. Create a `.vscode/mcp.json` file.
2. In `mcp.json`, configure your server:
```json theme={null}
{
"servers": {
"": {
"type": "http",
"url": ""
}
}
}
```
See the [VS Code documentation](https://code.visualstudio.com/docs/copilot/chat/mcp-servers) for more details.
### Example: Connect to the Mintlify MCP server
Connect to the Mintlify MCP server to search this documentation site within your preferred AI tool. This gives you more accurate answers about how to use Mintlify in your local environment and demonstrates how you can help your users connect to your MCP server.
At the top of this page, select the contextual menu and choose **Connect to Cursor** or **Connect to VS Code** to connect the Mintlify MCP server to the IDE of your choice.
To use the Mintlify MCP server with Claude:
1. Navigate to the [Connectors](https://claude.ai/settings/connectors) page in the Claude settings.
2. Select **Add custom connector**.
3. Add the Mintlify MCP server:
* Name: `Mintlify`
* URL: `https://mintlify.com/docs/mcp`
4. Select **Add**.
1. When using Claude, select the attachments button (the plus icon).
2. Select the Mintlify MCP server.
3. Ask Claude a question about Mintlify.
See the [Model Context Protocol documentation](https://modelcontextprotocol.io/docs/tutorials/use-remote-mcp-server#connecting-to-a-remote-mcp-server) for more details.
To use the Mintlify MCP server with Claude Code, run the following command:
```bash theme={null}
claude mcp add --transport http Mintlify https://mintlify.com/docs/mcp
```
Test the connection by running:
```bash theme={null}
claude mcp list
```
See the [Claude Code documentation](https://docs.anthropic.com/en/docs/claude-code/mcp#installing-mcp-servers) for more details.
Install in Cursor
To connect the Mintlify MCP server to Cursor, click the **Install in Cursor** button. Or to manually connect the MCP server, follow these steps:
1. Use Command + Shift + P (Ctrl + Shift + P on Windows) to open the command palette.
2. Search for "Open MCP settings".
3. Select **Add custom MCP**. This opens the `mcp.json` file.
In `mcp.json`, add:
```json theme={null}
{
"mcpServers": {
"Mintlify": {
"url": "https://mintlify.com/docs/mcp"
}
}
}
```
In Cursor's chat, ask "What tools do you have available?" Cursor should show the Mintlify MCP server as an available tool.
See [Installing MCP servers](https://docs.cursor.com/en/context/mcp#installing-mcp-servers) in the Cursor documentation for more details.
Install in VS Code
To connect the Mintlify MCP server to VS Code, click the **Install in VS Code** button. Or to manually connect the MCP server, create a `.vscode/mcp.json` file and add:
```json theme={null}
{
"servers": {
"Mintlify": {
"type": "http",
"url": "https://mintlify.com/docs/mcp"
}
}
}
```
See the [VS Code documentation](https://code.visualstudio.com/docs/copilot/chat/mcp-servers) for more details.